 Pin it
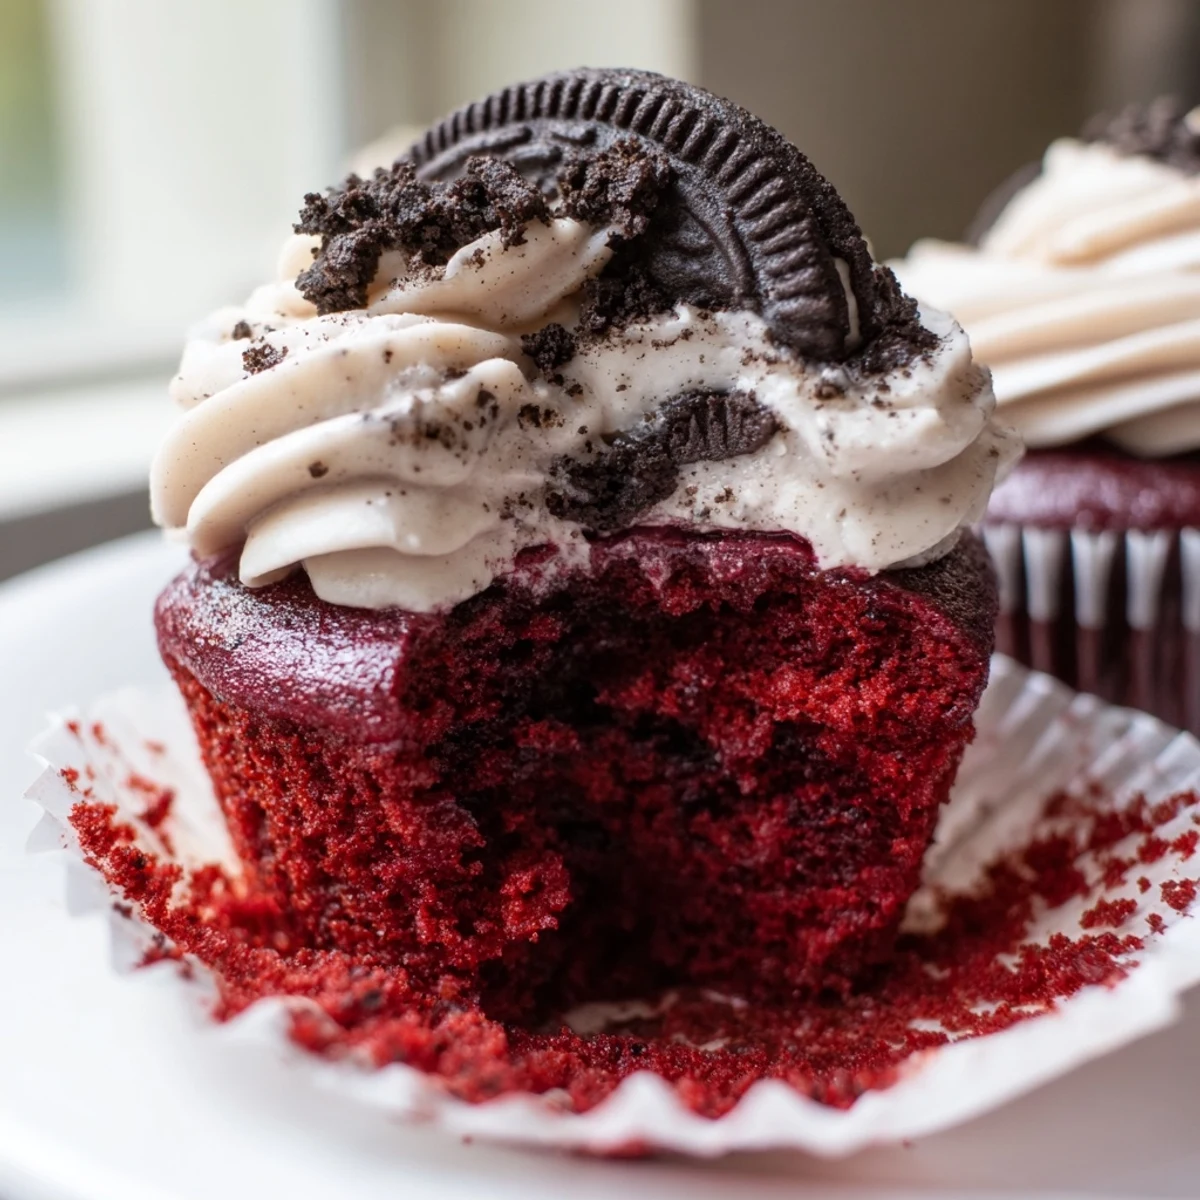
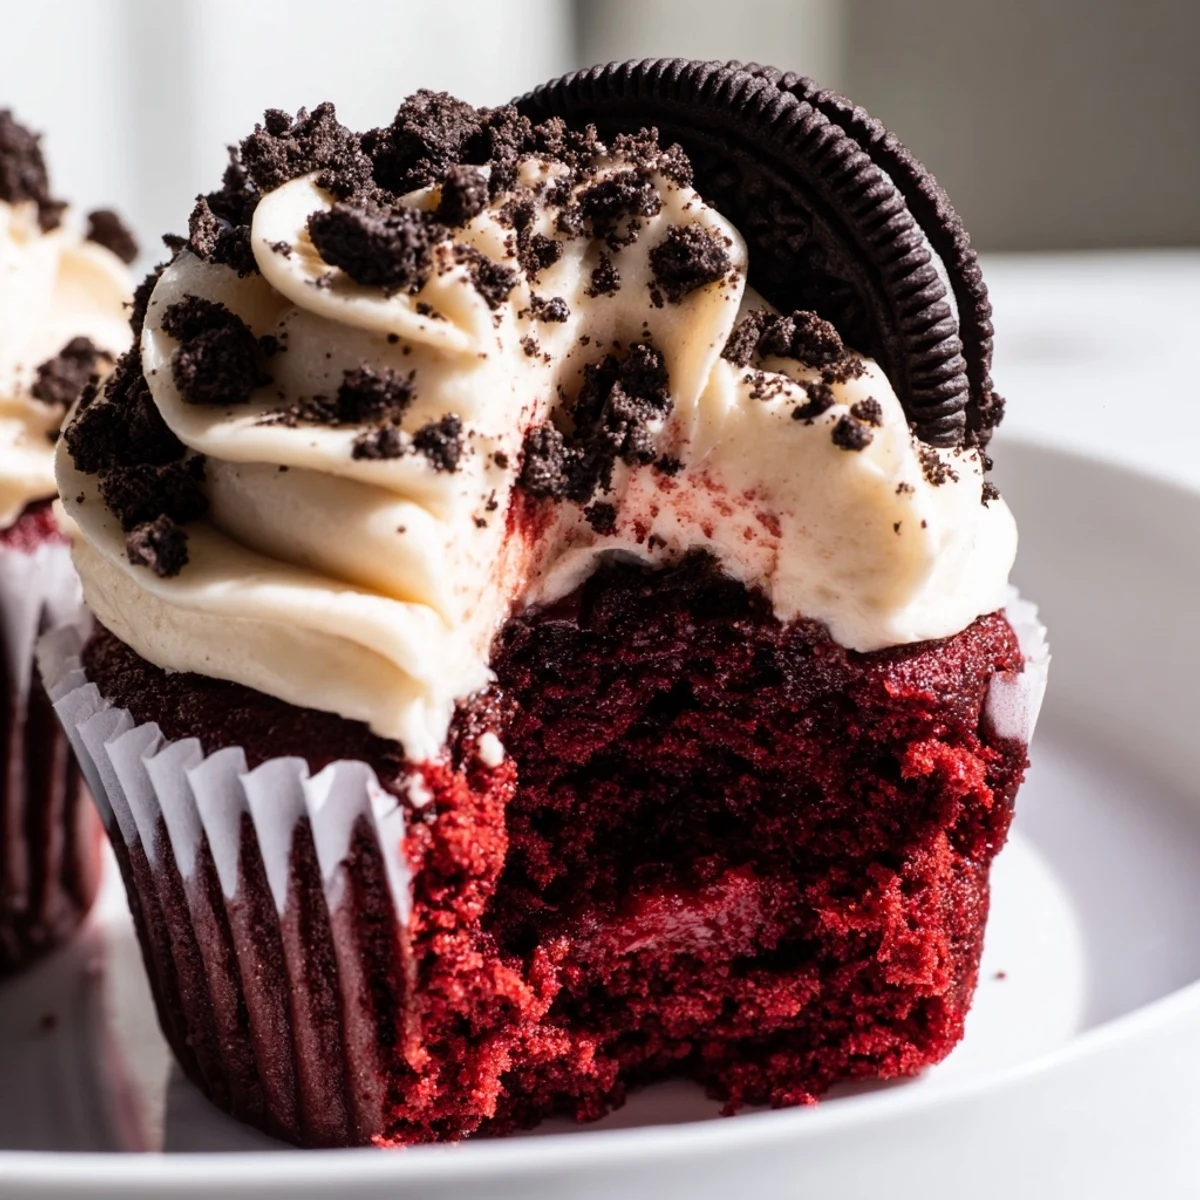
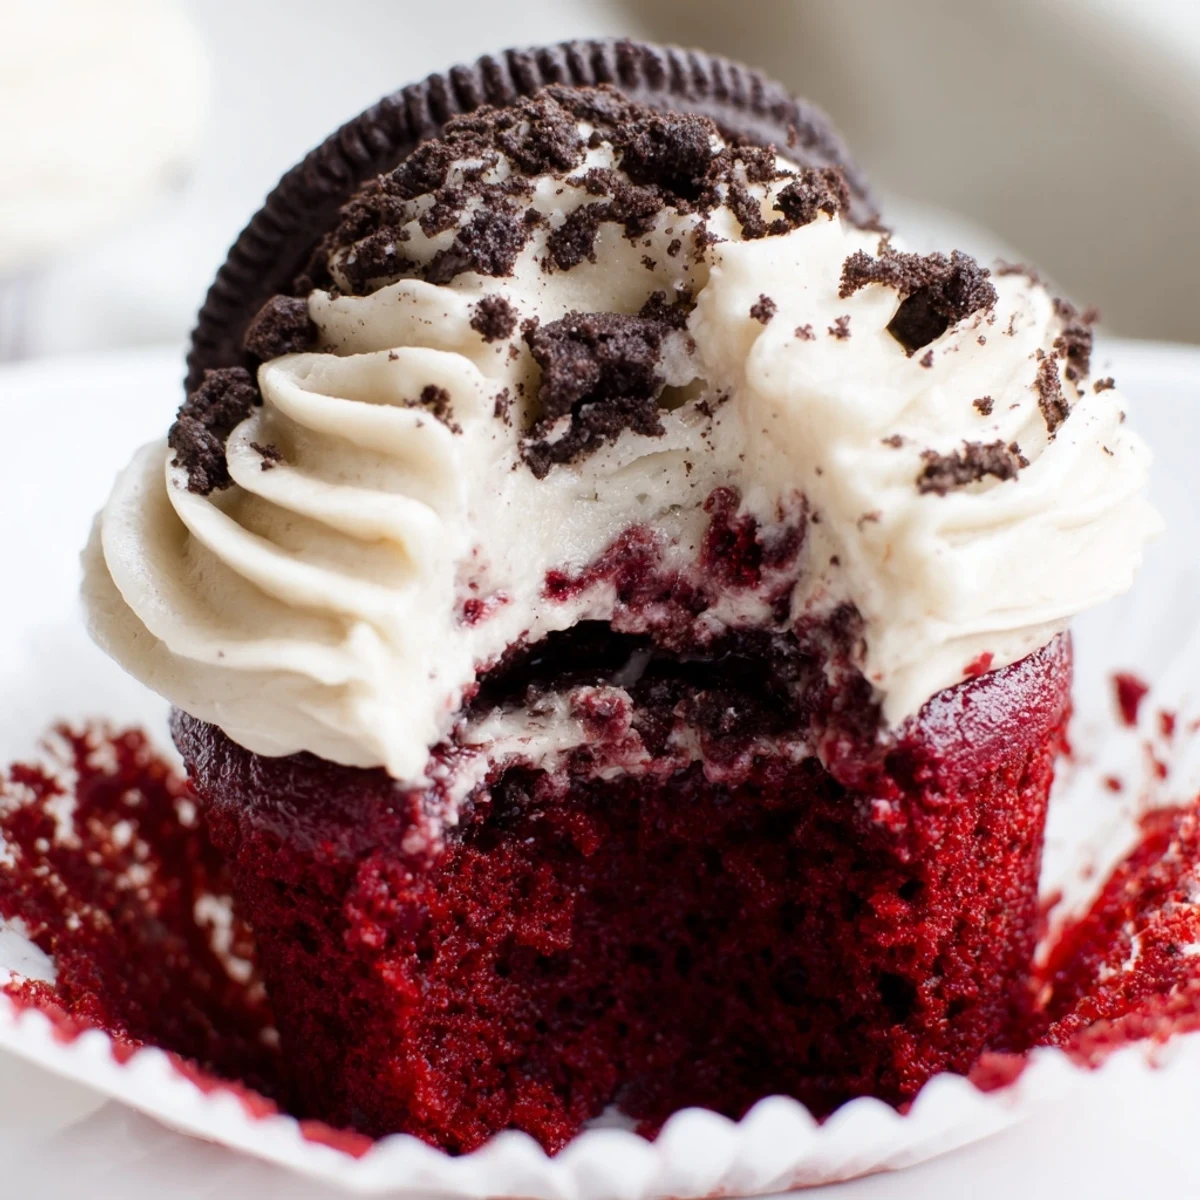
 These indulgent American desserts combine the best of two worlds: tender red velvet sponge and iconic Oreo cookies. Each cupcake hides a whole Oreo at the bottom, creating a delightful surprise with every bite.
The batter comes together with cocoa powder, buttermilk, and vibrant red food coloring for that classic velvet texture and hue. A luscious cream cheese frosting loaded with crushed Oreos finishes them off beautifully.
Perfect for celebrations, bake sales, or whenever you crave something truly decadent. Allow about 40 minutes total from prep to cooled and frosted.
My kitchen looked like a crime scene the first time I attempted red velvet anything, with crimson smears across the counter, my apron, and somehow the ceiling fan. But those Oreo tucked at the bottom of each liner were the stroke of genius that turned a messy afternoon into something my friends still beg me to bring to every gathering. The contrast between that soft, faintly chocolate crumb and the crunchy cookie hiding underneath is the kind of surprise that makes people close their eyes when they take a bite. This recipe has been through at least a dozen iterations in my kitchen, and I finally nailed the balance.
I brought a batch of these to a coworkers birthday lunch once, fully intending to share the recipe afterward, but the plate was licked clean before I even sat down. Someone asked if I had bought them from a bakery, which remains one of the proudest moments of my amateur baking life. The espresso powder trick came from that same day, when I realized the chocolate flavor needed a little boost to stand up to all that cream cheese.
Ingredients
- All-purpose flour (1 cup, 125 g): Keeps the crumb tender, so measure with a light hand and never pack it down.
- Unsweetened cocoa powder (2 tbsp, 15 g): Just enough to give red velvet its signature mild chocolate undertone without turning it into a full chocolate cupcake.
- Baking soda (1/2 tsp) and salt (1/4 tsp): The leavening gives lift while salt sharpens every flavor in the batter.
- Unsalted butter, softened (1/2 cup, 115 g): Room temperature butter is non-negotiable for getting that airy, fluffy texture when creamed with sugar.
- Granulated sugar (1 cup, 200 g): Dissolves during creaming and creates those little air pockets that make the cupcake soft.
- Large eggs (2, room temperature): Cold eggs can seize the butter, so pull them out early or soak in warm water for ten minutes.
- Buttermilk (1/2 cup, 120 ml, room temperature): The acidity reacts with baking soda for a tender crumb and adds a subtle tang that red velvet needs.
- Vanilla extract (1 tsp for batter, 1 tsp for frosting): Use the real stuff here because it bridges the chocolate and the tang beautifully.
- Red food coloring (1 tbsp): Gel gives you a more vivid, dramatic red without thinning the batter like liquid can.
- Oreo cookies (12 whole, plus extra for garnish): These go raw into the bottom of each liner and bake into the softest little surprise crust.
- Cream cheese, softened (8 oz, 225 g): Full fat brick style cream cheese is the only way to get frosting that holds its shape.
- Unsalted butter for frosting (1/2 cup, 115 g): Adds structure and silkiness to the cream cheese so it pipes without flopping.
- Powdered sugar, sifted (2 cups, 240 g): Sifting prevents those awful lumps that show up when you are already tired and just want to frost.
- Crushed Oreo cookies (4, for folding into frosting): Crush them finely but not into dust because tiny crunch pieces are what make this frosting special.
Instructions
- Preheat and prep your pan:
- Crank the oven to 350 degrees Fahrenheit and line a 12 cup muffin tin with paper liners. This is also a good moment to clear your counter because red food coloring is unforgiving on white surfaces.
- Plant the Oreo surprise:
- Drop one whole Oreo cookie into the bottom of each liner, creamy filling side facing up. Try to resist eating them before the batter gets there.
- Whisk the dry ingredients:
- In a medium bowl, combine the flour, cocoa powder, baking soda, salt, and a pinch of espresso powder if you are feeling bold. Whisk until evenly blended and no cocoa lumps remain.
- Cream butter and sugar:
- Beat the softened butter and sugar together in a large bowl until the mixture turns pale and looks almost whipped. Add the eggs one at a time, mixing well after each so everything stays emulsified.
- Add the red velvet liquids:
- Pour in the buttermilk, vanilla extract, and red food coloring, then mix until the batter turns a gorgeous deep crimson. Scrape down the bowl because red batter likes to hide in corners.
- Combine wet and dry:
- Gradually add the dry ingredients to the wet mixture, stirring until just combined and no dry streaks remain. Overmixing is the enemy of a tender crumb, so stop while you are ahead.
- Fill the liners:
- Spoon or scoop the batter evenly over each Oreo, filling the liners about three quarters full. The batter will dome and puff as it bakes, so leave it room to breathe.
- Bake and cool:
- Bake for 18 to 20 minutes, checking with a toothpick inserted into the cake portion, not the cookie. Let them cool in the pan for five minutes before transferring to a rack to cool completely.
- Make the cookies and cream frosting:
- Beat the cream cheese and butter together until perfectly smooth and lump free, then add sifted powdered sugar and vanilla. Fold in the crushed Oreos gently so you keep those nice little crunch pieces intact.
- Frost and garnish:
- Pipe or spread the frosting generously onto each cooled cupcake. Top with extra Oreo crumbs or a mini Oreo if you want maximum visual impact.
 Pin it
 The moment these cupcakes became more than food was when my niece, who was three at the time, bit into one and gasped at the hidden cookie at the bottom like I had performed a magic trick. She still asks for the cookie cake cupcakes every birthday.
Storing These Cupcakes
Because of the cream cheese frosting, these cupcakes need to live in the refrigerator after the first couple of hours at room temperature. I store them in a single layer in an airtight container and they stay good for up to three days, though they rarely last that long in my house. Let them sit out for about twenty minutes before serving so the frosting softens back to its proper texture.
Making Them Your Own
The espresso powder addition is technically optional but I have never met someone who regretted adding it. You can also swap the Oreos for golden Oreos if you want a fun twist, or use different food coloring to make these for holidays beyond Valentine season. A friend of mine once added a teaspoon of cinnamon to the batter and swore it was an improvement I am still on the fence about that one.
Tools That Make This Easier
An electric mixer is your best friend for creaming butter and sugar until truly fluffy, though a strong arm and a whisk will work if you are committed. A cookie scoop makes dividing batter evenly among the liners almost effortless and keeps your hands clean. Piping bags are optional but they make the finished cupcakes look like they came from a professional kitchen.
- Use an ice cream scoop for perfectly even batter distribution every single time.
- Chill your mixing bowl before making frosting to help the cream cheese hold its shape better.
- Always test a toothpick in the cake portion and never through the Oreo at the bottom.
 Pin it
 These cupcakes are pure joy in paper wrappers, and every single time you make them someone will ask for the recipe. Hand it over generously, but maybe keep the Oreo trick a secret for a while.
Recipe FAQs
- → Can I make these cupcakes without food coloring?
-
Technically yes, but they will lose the signature red velvet appearance. You can use beetroot powder as a natural alternative, though the color will be more muted and the flavor slightly earthy.
- → Why place a whole Oreo at the bottom of each liner?
-
The whole Oreo acts as a flavorful base crust. As the cupcake bakes, the cookie softens slightly while the cream filling melds into the sponge, adding moisture and a wonderful textural contrast.
- → How should I store finished cupcakes?
-
Refrigerate them in an airtight container for up to three days because of the cream cheese frosting. Let them sit at room temperature for about 15 minutes before serving for the best texture and flavor.
- → Can I freeze these cupcakes?
-
You can freeze the unfrosted cupcakes for up to two months wrapped tightly in plastic wrap. Thaw overnight in the refrigerator, then add freshly made frosting before serving for the best results.
- → What type of food coloring works best?
-
Gel food coloring delivers a more vibrant, concentrated red with less liquid than standard liquid coloring. If using liquid coloring, you may need a full tablespoon, while gel requires only about a teaspoon for the same intensity.
- → Can I use a different frosting instead of cream cheese?
-
A Swiss meringue buttercream or stabilized whipped cream would also pair nicely. However, cream cheese frosting is classic for red velvet and the crushed Oreo addition complements it perfectly.
