 Pin it
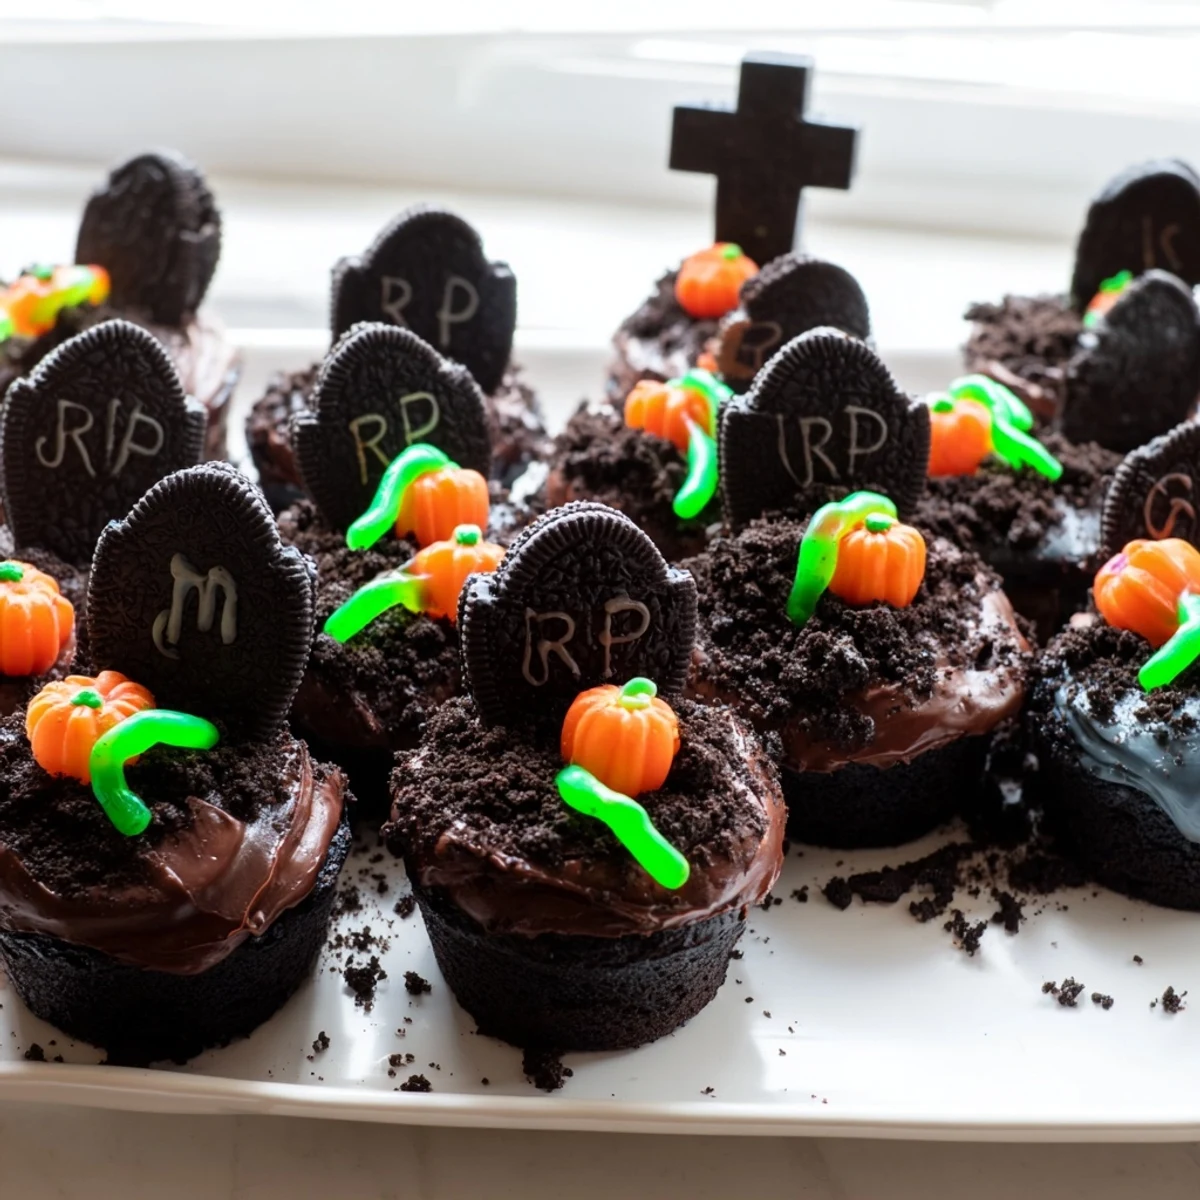
 These graveyard-themed cupcakes feature moist chocolate bases topped with rich chocolate frosting. Crushed chocolate sandwich cookies create realistic soil, while rectangular cookies decorated with gel icing become tombstones. Gummy worms and candy pumpkins add extra creepy touches. Perfect for Halloween parties, this interactive dessert brings fun to any gathering.
Last October my daughter decided Halloween wasn't just about costumes anymore—she wanted our dessert table to tell a story. We stayed up past midnight crushing cookies and piping RIP onto Milano biscuits with shaky hands, giggling every time one tombstone looked more like it was waving than buried. Now it's the one request I get before the leaves even start turning.
My neighbor's annual Halloween party became legendary when someone brought these a few years back. Adults were crowding around the dessert table, choosing their favorite tombstone and debating whether the gummy worms were authentic enough. I've watched skeptical teenagers get weirdly invested in arranging the graveyard scene while the frosting was still soft.
Ingredients
- 1 ½ cups all-purpose flour: The foundation that holds everything together—dont pack it down when measuring
- 1 cup granulated sugar: Cream this with the butter until it looks like fluffy clouds, not just mixed
- ½ cup unsalted butter, softened: Leave it on the counter for an hour—room temperature butter incorporates like magic
- ½ cup whole milk: Full fat keeps these tender, but Ive used oat milk in a pinch
- 2 large eggs: Crack them into a separate bowl first—catching a shell mid-batter is the worst
- 2 tsp baking powder: Make sure its fresh or your cupcakes will stay stubbornly flat
- 1 tsp vanilla extract: The difference between good cupcakes and great ones
- ¼ tsp salt: Just enough to make the chocolate sing
- 1 cup unsalted butter for frosting: This makes a lot of frosting, but youll want it thick for that dirt effect
- 2 ½ cups powdered sugar: Sift it first or youre fishing for lumps later
- ½ cup unsweetened cocoa powder: Dutch processed gives the darkest, smoothest taste
- 2-3 tbsp milk for frosting: Start with 2—add more only if its genuinely too stiff
- 1 tsp vanilla extract for frosting: Rounds out the chocolate beautifully
- Pinch of salt: Trust me, it needs this to avoid cloying sweetness
- 6–8 chocolate sandwich cookies: Oreos work perfectly, but any chocolate sandwich cookie creates the best dirt texture
- 6–8 rectangular cookies: Milanos, Vienna Fingers, or even graham crackers cut into rectangles make ideal tombstones
- Black, white, and green gel icing pens: The gel shows up better than writing icing and dries with a nice sheen
- Optional decorations: Gummy worms, candy pumpkins, candy bones—whatever creepy additions you find
Instructions
- Preheat your oven to 350°F (175°C) and line a 12-cup muffin tin:
- Cupcake liners make cleanup so much easier, plus they add a nice frame for each little cake
- Cream the butter and sugar until light and fluffy:
- Take your time here—we're talking 3 to 5 minutes of beating until the mixture looks pale and feels silky
- Beat in eggs one at a time, then add vanilla:
- Each egg needs time to emulsify—scrape the bowl so everything gets incorporated evenly
- Whisk together the dry ingredients:
- Flour, baking powder, and salt should be combined well in a separate bowl before they meet the wet mixture
- Alternate adding dry ingredients and milk:
- Add half the flour, then all the milk, then the remaining flour—mix until just combined but no more
- Divide batter and bake for 18–20 minutes:
- Fill each liner 2/3 full and check for doneness with a toothpick—it should come out clean or with just a few crumbs
- Cool cupcakes completely on a wire rack:
- Frosting warm cupcakes is a rookie mistake—patience pays off here
- Beat the butter until creamy:
- A full minute of whipping the butter alone makes everything smoother later
- Add powdered sugar and cocoa slowly:
- Low speed keeps the cocoa cloud from exploding all over your kitchen
- Add vanilla and milk, beat until smooth:
- Spreadable consistency is key—think peanut butter texture, not stiff or runny
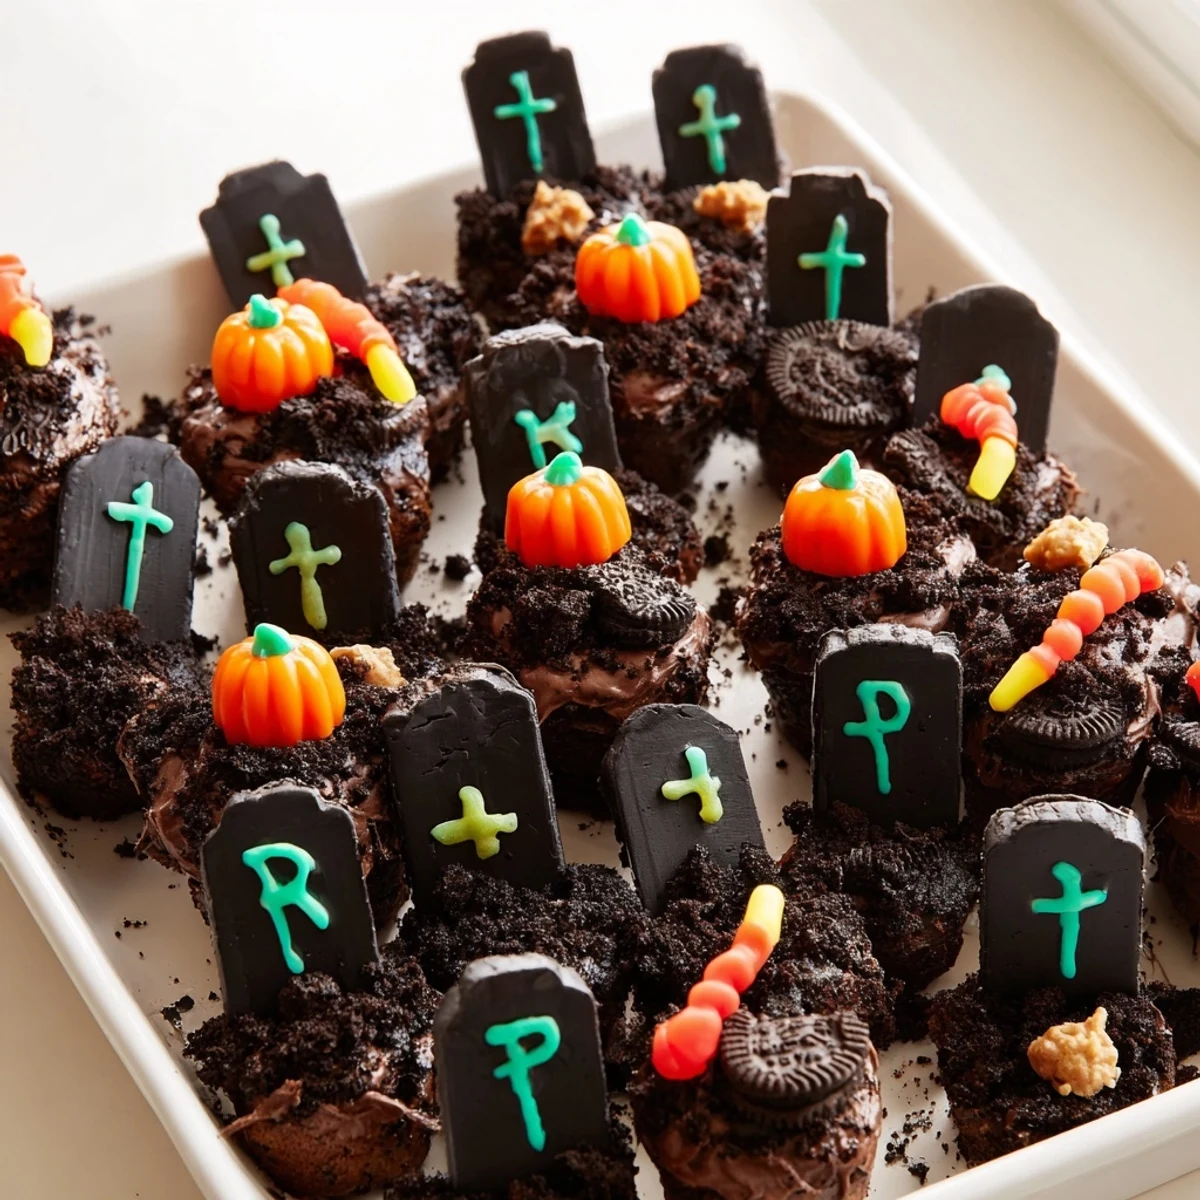
- Arrange cooled cupcakes close together:
- A rectangular shape mimics a graveyard best—make sure they're touching so frosting bridges the gaps
- Frost generously to create a surface:
- Dont be shy—you need a thick layer to hold all those crushed cookies and tombstones
- Crush cookies and sprinkle for dirt:
- A ziplock bag and rolling pin keeps the mess contained and gives you control over the chunkiness
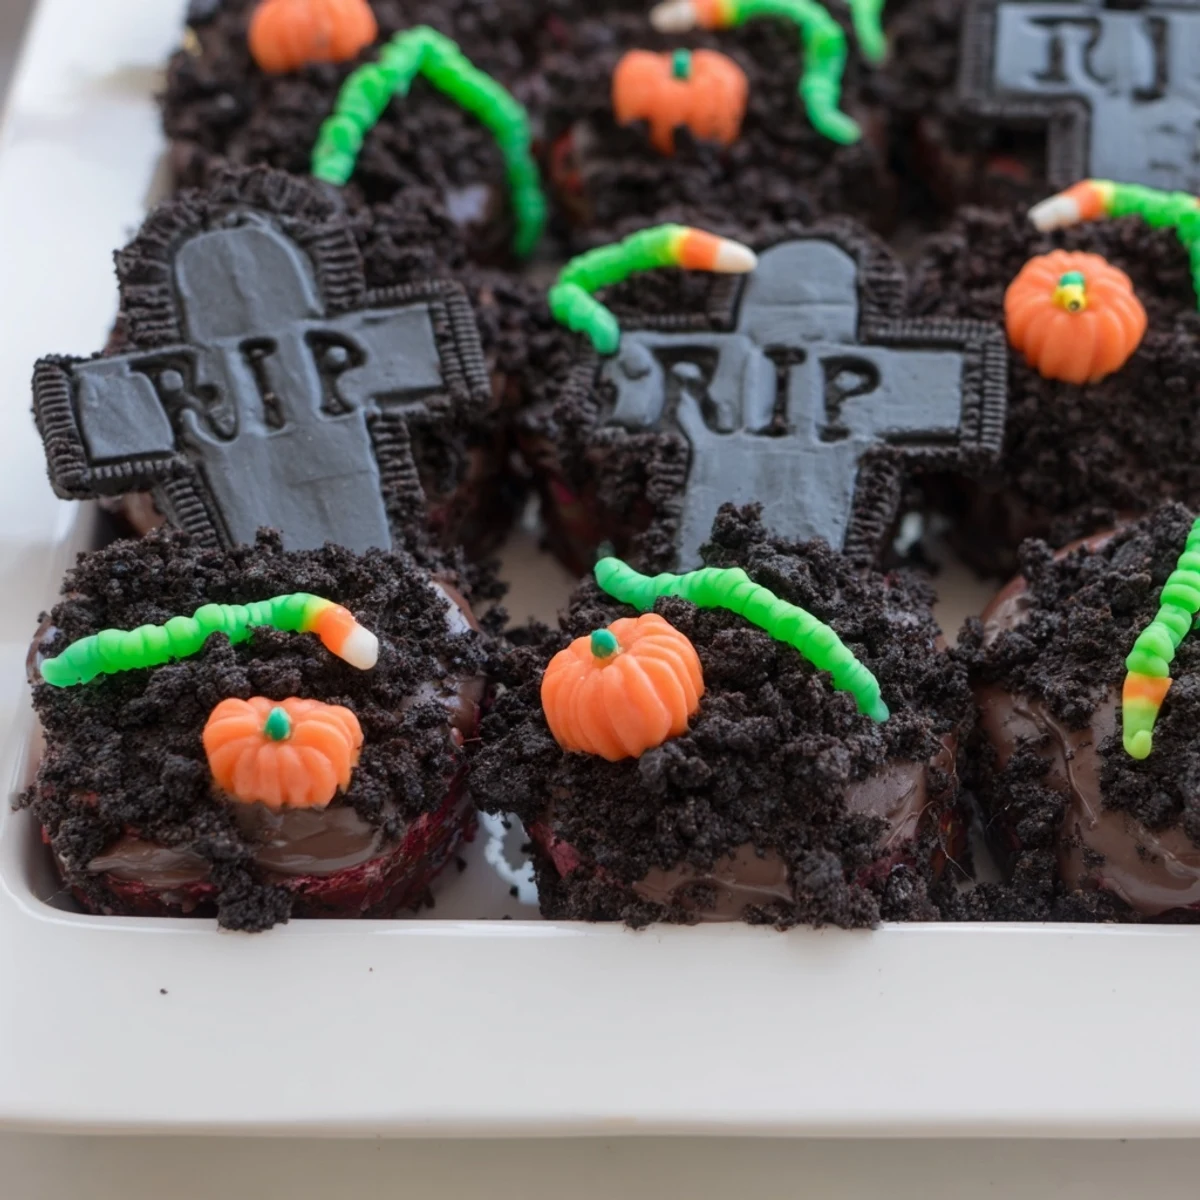
- Decorate tombstones and arrange the graveyard:
- Write your RIP messages first, then press them into the frosting at slightly different angles for realism
- Add gummy worms and spooky candies:
- Tuck them partially into the dirt so they look like they're emerging from the graves
 Pin it
 The year I made these for my office potluck, I came back to find the graveyard scene completely rearranged. Apparently the accounting department had held a funeral for a failed spreadsheet, complete with printed eulogy tucked beside a particularly lopsided tombstone. Sometimes dessert becomes exactly what people need.
Making It Gluten Free
Ive made these with a 1 to 1 gluten free flour blend and nobody noticed the difference. Just use gluten free sandwich cookies for the dirt and youve got a treat everyone can actually enjoy without asking a dozen questions about ingredients first.
Getting Kids Involved
The decorating part is where kids absolutely shine. I set up a station with different toppings and let them create their own mini graveyards—some kids went full spooky while others made surprisingly cheerful cemeteries with candy corn flowers.
Make Ahead Magic
You can bake and freeze the cupcakes up to a week ahead, then thaw and frost the day of your party. The tombstones can even be written and stored in an airtight container so the real work happens in under an hour before serving.
- Crush your cookie dirt the night before to save time
- Keep frosting slightly thicker than normal if transporting
- Bring the whole graveyard out last—these disappear fast
 Pin it
 Hope your Halloween is filled with more treats than tricks this year.
Recipe FAQs
- → How far ahead can I make these?
-
Prepare cupcakes and frosting 1-2 days before decorating. Store unfrosted cupcakes in an airtight container. Add decorations within 24 hours of serving for best freshness.
- → What cookies work best for tombstones?
-
Rectangular biscuits like shortbread, graham crackers, or vanilla wafers provide sturdy surfaces. Milano cookies or rectangular sandwich cookies also work well for writing epitaphs.
- → Can I make these gluten-free?
-
Substitute gluten-free all-purpose flour blend for regular flour. Use gluten-free sandwich cookies for the dirt and certified gluten-free biscuits for tombstones.
- → How do I transport the assembled cupcakes?
-
Use a large flat board or sturdy cardboard base. Secure decorations with extra frosting. Transport flat and keep chilled until serving to prevent sliding.
- → What other decorations work well?
-
Black pipe cleaners for fences, candy bones, skull-shaped gummies, pretzel sticks for twigs, crushed Oreos mixed with green sprinkles for moss. Use themed sprinkles for extra flair.
- → Can I use box cake mix instead?
-
Yes, prepare chocolate cake mix according to package directions. The homemade frosting and decorations are what make these special, so starting with mix saves time without sacrificing presentation.
