 Pin it
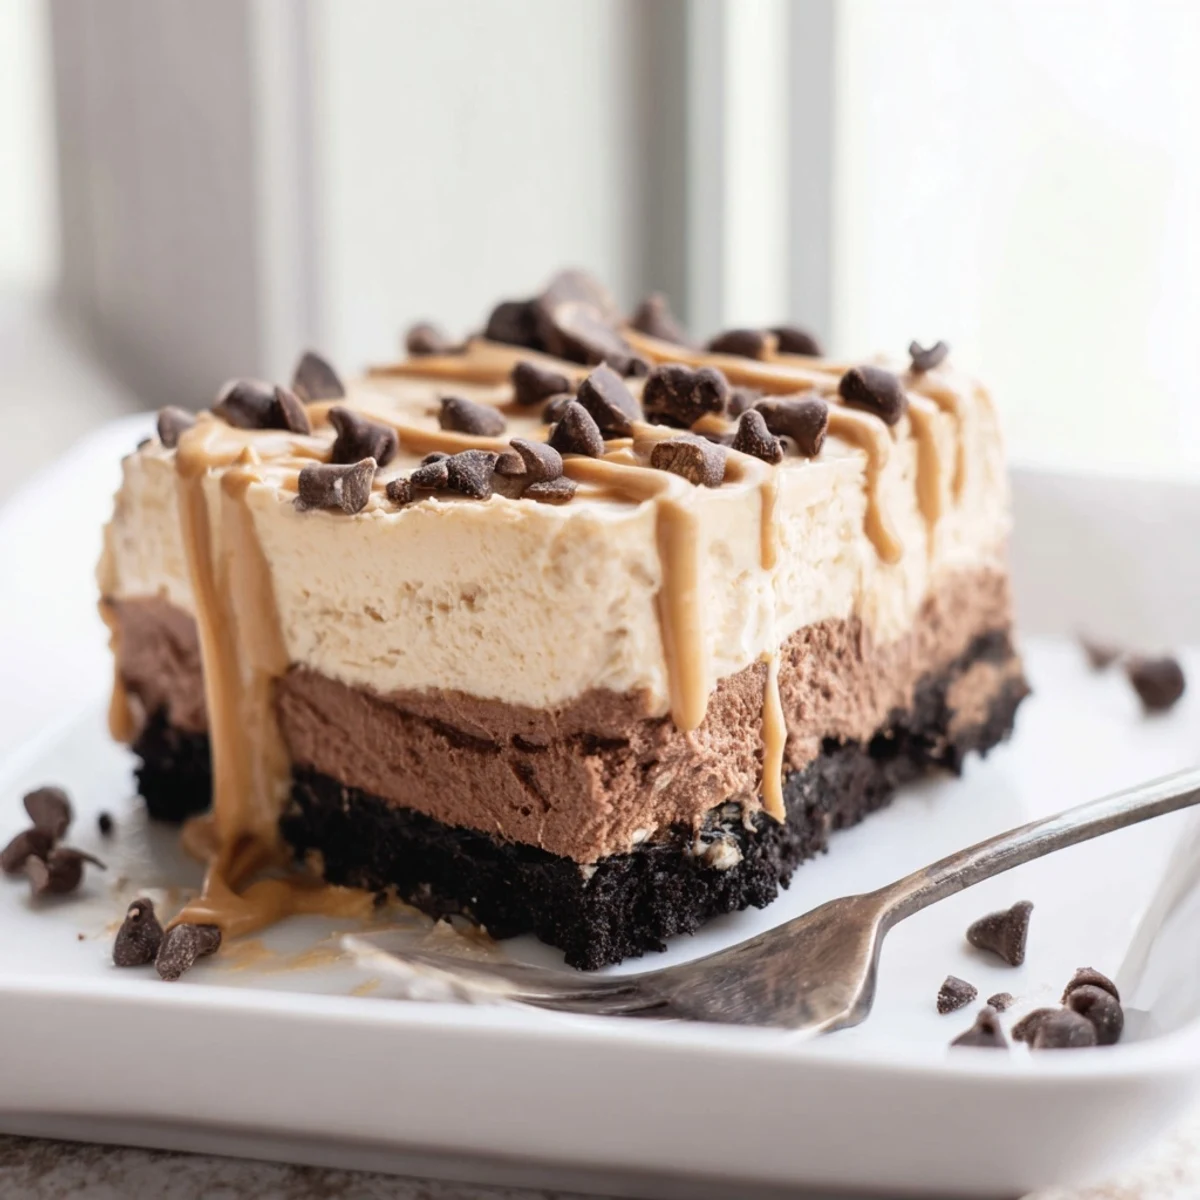
 This no-bake peanut butter layered delight brings together a crunchy chocolate cookie crust, a velvety peanut butter cream cheese filling, rich chocolate pudding, and a fluffy whipped topping. Ready in just 25 minutes of prep, it chills to perfection in the fridge.
Each square delivers a satisfying contrast of textures—from the crisp base to the smooth, creamy layers. It's an ideal make-ahead dessert for gatherings, potlucks, or any occasion that calls for something sweet and indulgent.
The smell of peanut butter and chocolate mingling in the fridge is enough to make anyone hover around the kitchen for three hours straight, which is exactly what happened when I brought this dessert to a potluck last summer. People kept lifting the foil cover just to peek. By the time it was properly set and ready to slice, half the pan already had fingerprints near the edges. That is the power of a no-bake layered dessert.
My neighbor Karen stopped by while I was pressing the cookie crust into the pan and ended up staying to help with every single layer. She claimed she was just being polite but I caught her licking the spatula twice.
Ingredients
- Chocolate sandwich cookies (200 g, crushed): The crust is everything here, and chocolate sandwich cookies give you a rich, sturdy base that holds up to the creamy layers without turning soggy overnight.
- Unsalted butter (75 g, melted): Acts as the glue for your crust, and using unsalted lets you control the flavor balance since the peanut butter layer already brings plenty of richness.
- Cream cheese (225 g, softened): Make sure it is truly at room temperature before beating, unless you enjoy chasing lumps around a bowl for twenty minutes like I did the first time.
- Creamy peanut butter (120 g): Stick with a standard creamy variety rather than natural or stir kind, because the stabilizers help the layer set firm and slice cleanly.
- Powdered sugar (100 g): Sweetens the peanut butter layer without adding any graininess, dissolving right into the cream cheese mixture.
- Whipped topping (480 ml total, thawed): Divided between the peanut butter layer and the final topping, it keeps everything light and cloud-like through every bite.
- Instant chocolate pudding mix (1 package, 100 g): The instant version is key because it sets without cooking and thickens quickly once whisked with cold milk.
- Cold milk (375 ml): Whole milk gives the pudding layer a silkier texture, but any milk you have on hand will work just fine.
- Melted peanut butter and chocolate shavings (optional): A drizzle and a sprinkle on top turn this from a casual weeknight treat into something that looks like it came from a bakery case.
Instructions
- Build the crust:
- Toss the crushed cookies with melted butter until every crumb glistens, then press the mixture firmly and evenly into your baking dish using the back of a spoon or the flat bottom of a measuring cup. Pop it in the fridge so it firms up while you work on the next layer.
- Whip up the peanut butter layer:
- Beat the softened cream cheese, peanut butter, and powdered sugar together until completely smooth with no streaks remaining. Gently fold in 240 ml of the whipped topping with a spatula, keeping as much air in the mixture as you can, then spread it evenly over your chilled crust.
- Mix the chocolate pudding:
- Whisk the pudding mix and cold milk together for about two minutes until you feel it thicken under your whisk. Spread it gently over the peanut butter layer, trying not to disturb what is underneath.
- Finish and chill:
- Spread the remaining 240 ml whipped topping over the pudding, add your drizzle and chocolate shavings if using, then cover and refrigerate for at least three hours so everything sets into clean, sliceable layers.
 Pin it
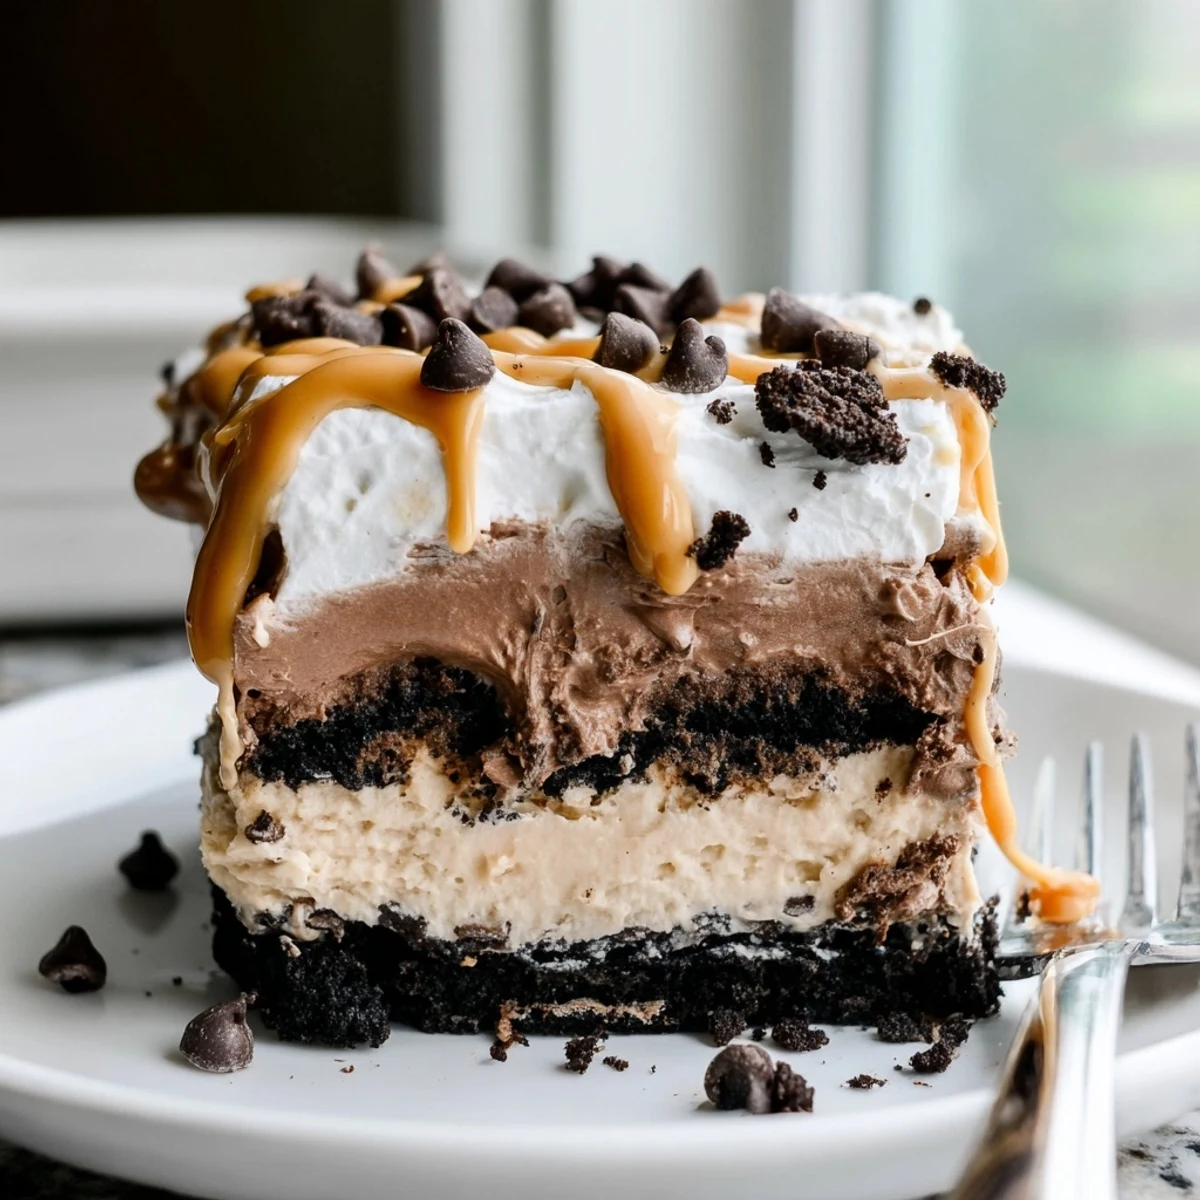
 The moment this dessert became more than food was when my friend silently handed me a container with the last square wrapped carefully inside after a party, a quiet thank you without any words needed.
Gluten-Free and Allergy Swaps
Gluten-free chocolate sandwich cookies work beautifully in the crust and most grocery stores carry them now. Just double check the pudding mix label too, since some brands sneak wheat into unexpected places. If peanuts are a concern, sunflower seed butter can stand in for peanut butter with a slightly earthier flavor.
Adding Extra Crunch
Scattering a handful of chopped roasted peanuts between the peanut butter layer and the pudding gives each square a satisfying snap that catches people off guard in the best way. Crushed toffee bits or even caramel drizzle have also made appearances in my kitchen when I wanted to change things up.
Serving and Storage Tips
Use a sharp knife dipped in hot water and wiped clean between cuts for the neatest slices, especially if you are serving this to guests. The dessert keeps well covered in the fridge for up to four days, though it rarely lasts that long in my house.
- Let the pan sit at room temperature for about ten minutes before slicing if it has been chilling overnight.
- Individual squares freeze surprisingly well wrapped tightly in plastic for up to one month.
- Always store leftovers covered so the top layer does not absorb fridge odors.
 Pin it
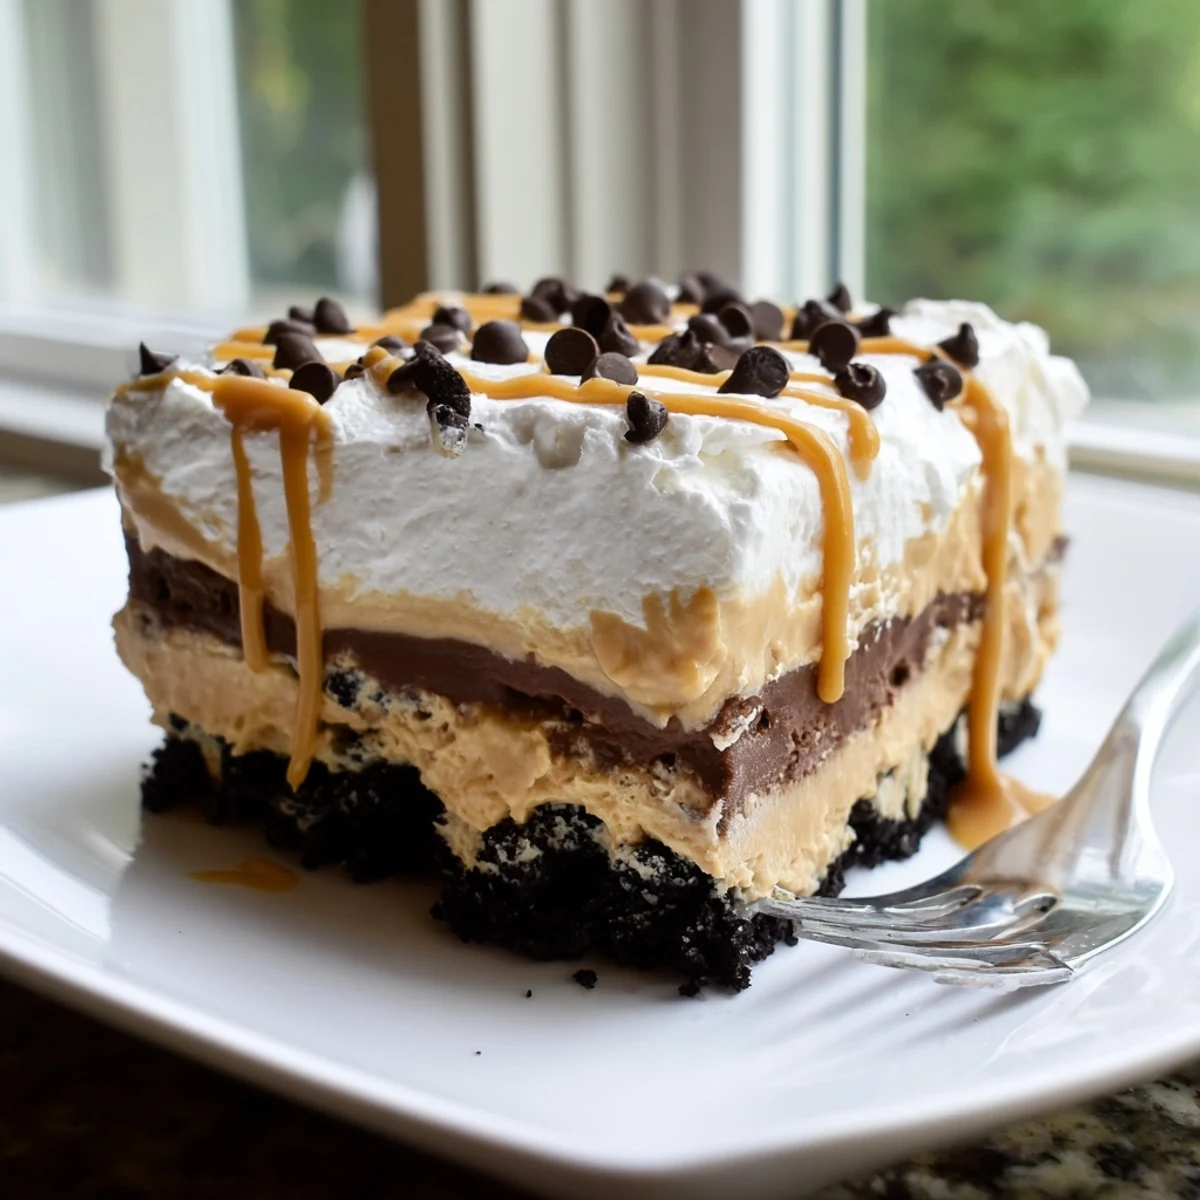
 This is the kind of dessert that makes people close their eyes on the first bite, and honestly that is all the reason you need to make it. Share it generously and keep a square hidden in the back of the fridge for yourself.
Recipe FAQs
- → Can I make this peanut butter layered delight ahead of time?
-
Yes, this dessert is perfect for making ahead. Prepare it the day before and keep it covered in the refrigerator. It actually tastes better after chilling overnight, as the layers set firmly and the flavors meld together beautifully.
- → Can I use natural peanut butter instead of creamy commercial peanut butter?
-
Commercial creamy peanut butter works best for the smooth, stable texture needed in the filling layer. Natural peanut butter tends to separate and can make the layer too oily or runny. If using natural peanut butter, make sure it's well-stirred and consider adding a bit more powdered sugar to help stabilize it.
- → How should I store leftovers?
-
Cover the baking dish tightly with plastic wrap or transfer individual squares to an airtight container. Store in the refrigerator for up to 4 days. The cookie crust may soften slightly over time, but the flavors will remain delicious.
- → Can I freeze this dessert?
-
Yes, you can freeze individual squares wrapped tightly in plastic wrap and placed in a freezer-safe container for up to 2 months. Thaw overnight in the refrigerator before serving. Note that the whipped topping texture may change slightly after freezing.
- → What can I substitute for whipped topping?
-
You can use an equal amount of homemade whipped cream. Whip 240 ml of heavy cream with 2 tablespoons of powdered sugar and half a teaspoon of vanilla extract until stiff peaks form. Keep in mind that homemade whipped cream is less stable than commercial whipped topping, so serve within a day or two.
- → How do I get clean slices when cutting this dessert?
-
Use a sharp knife and wipe it clean with a damp paper towel between each cut. Running the knife under hot water, then drying it quickly before each slice, also helps achieve clean, neat squares. Chill the dessert thoroughly for at least 3 hours before cutting for the best results.
