 Pin it
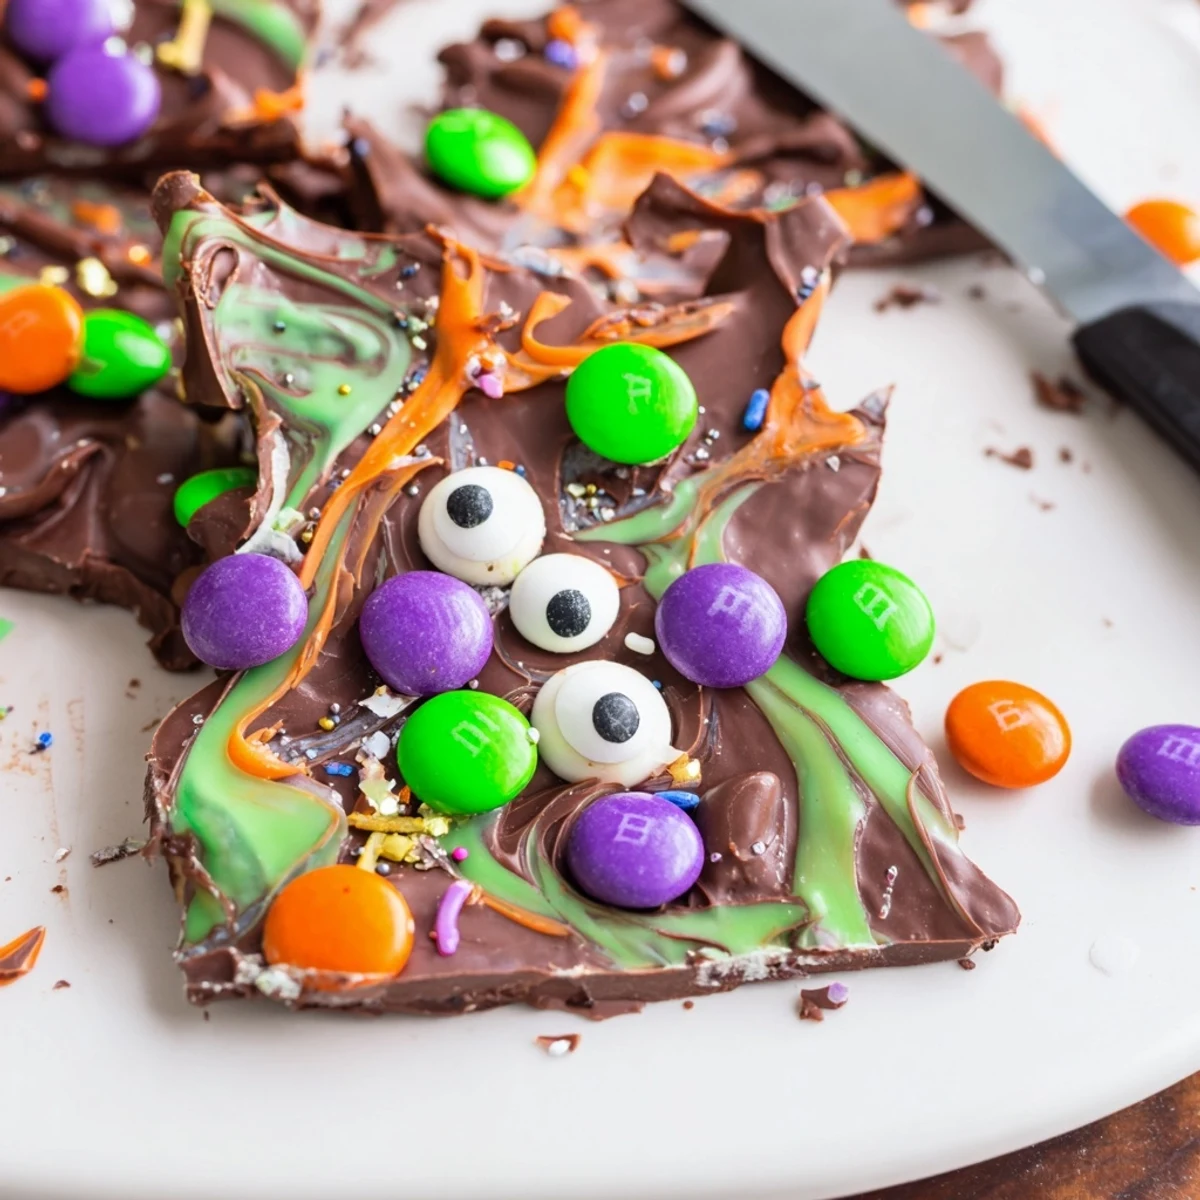
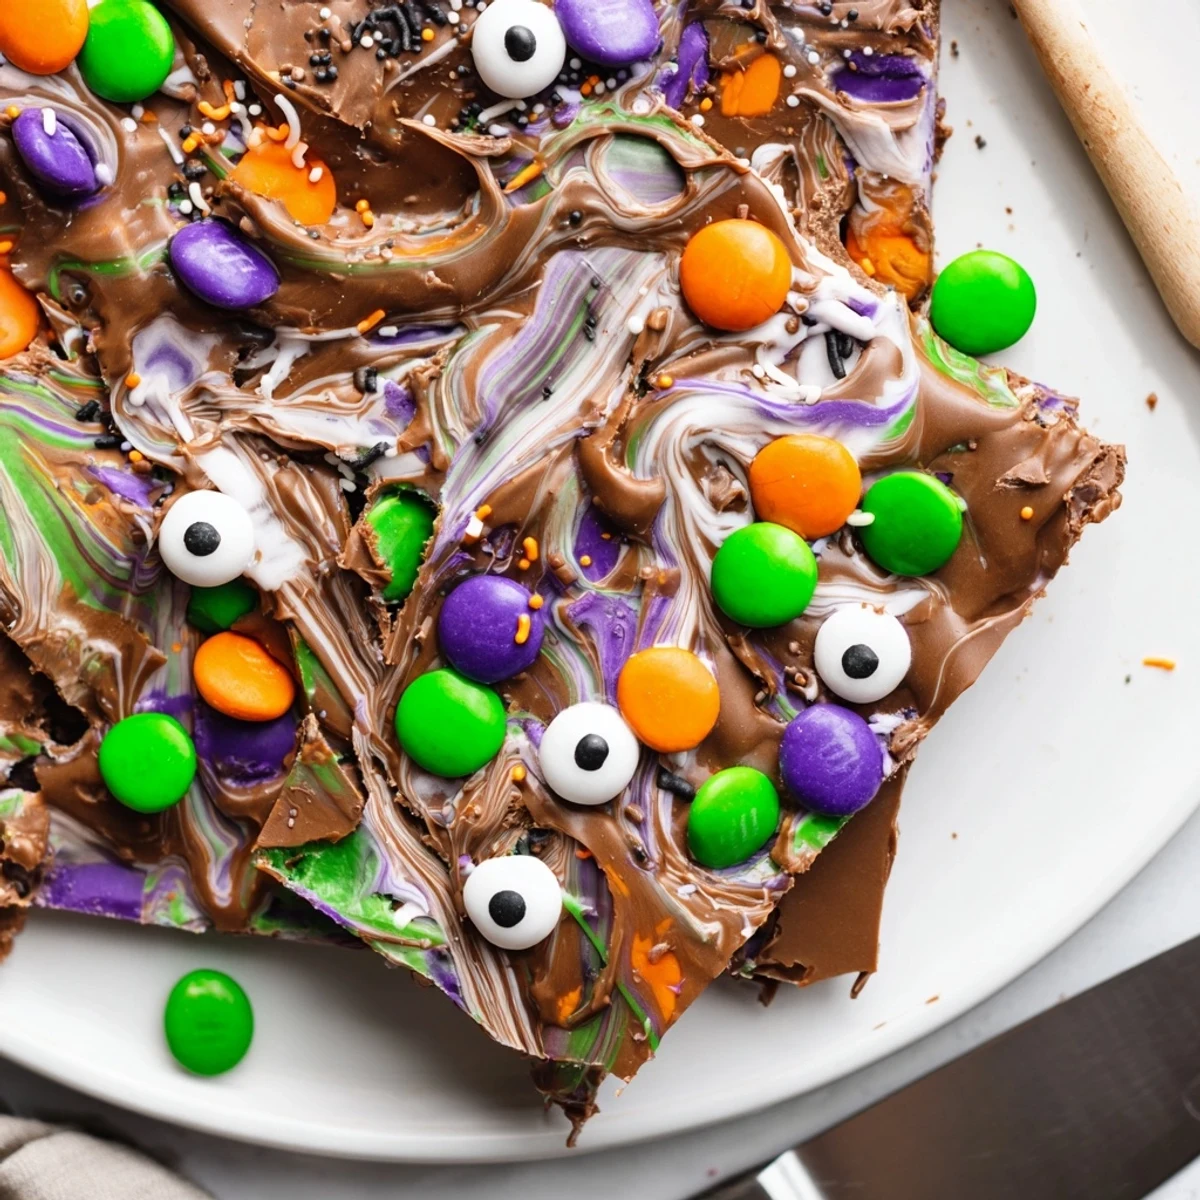
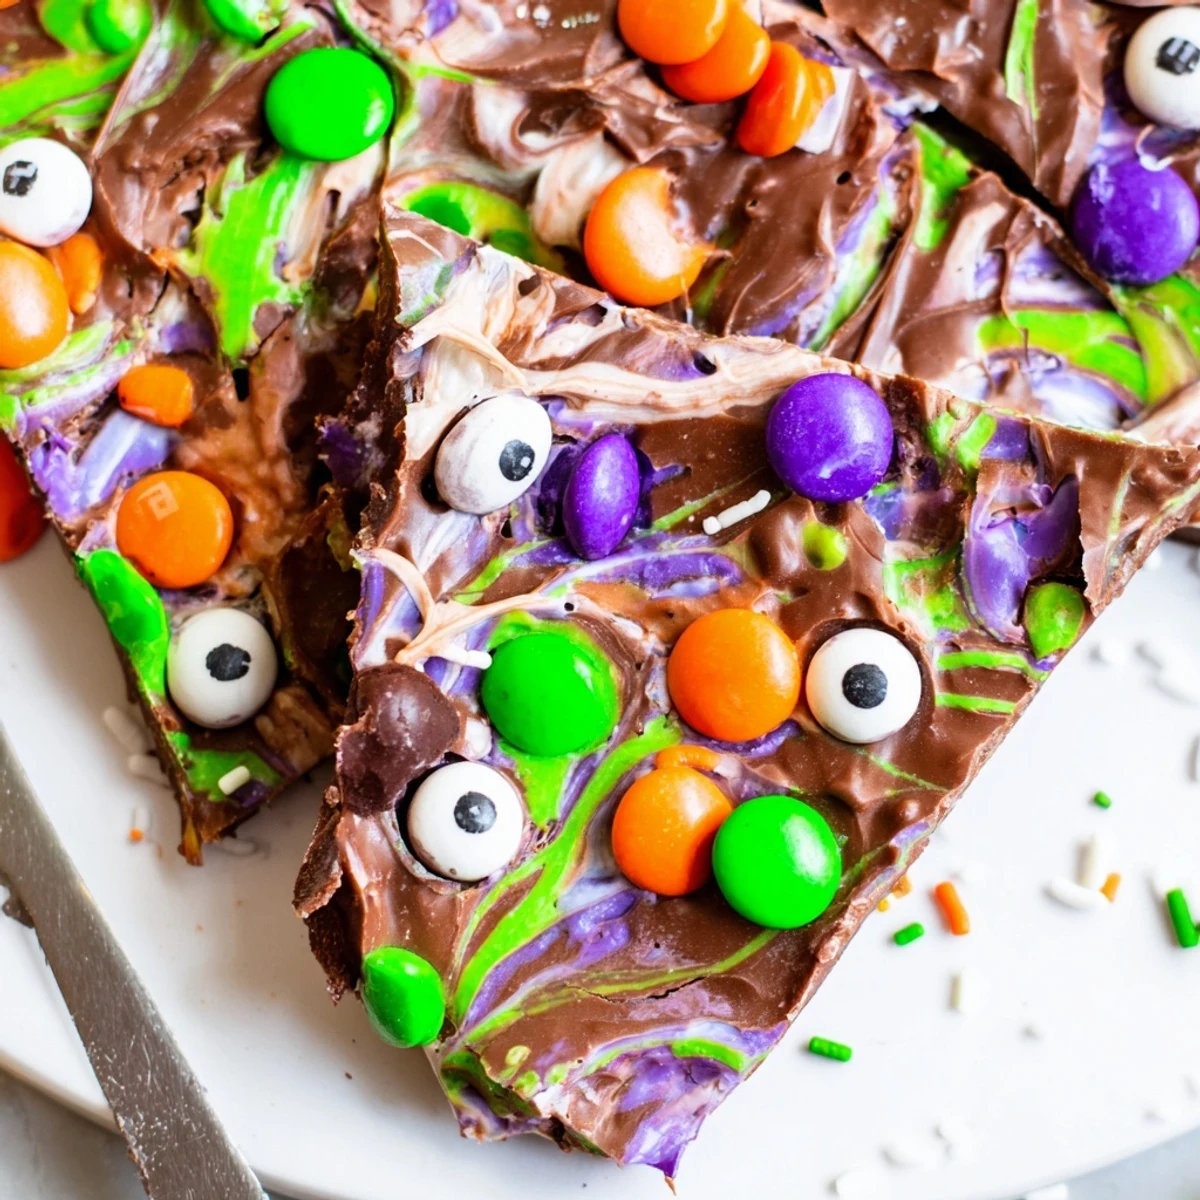
 This festive swirled chocolate bark combines melted semisweet and white chocolate with vibrant colorful candy melts for a marbled effect. Top with candy-coated chocolates, googly eyes, and Halloween sprinkles while warm for a spooky treat that sets quickly. Break into irregular pieces to serve or package as gifts.
Last Halloween my kitchen looked like a chocolate explosion, and I couldnapost care less. I'd decided to make witches bark on a whim after my daughter insisted we needed something spookier than regular cookies. The candy melts were swirling, the sprinkles were flying everywhere, and we ended up with half the decorations on the floor and half on the chocolate. Best messy afternoon we have had in ages.
I brought a batch to my friend's annual Halloween potluck, and honestly, I almost kept it all for myself. The way the white chocolate and candy melts marble together makes each piece look completely unique. Her six year old spent ten minutes arranging the candy eyes like they were watching him, then proudly declared me the official witch of the neighborhood. Adults were sneaking pieces just as fast as the kids.
Ingredients
- Semisweet chocolate chips: The dark base creates that gorgeous contrast against white chocolate and colorful candy melts, plus semisweet holds its shape well when swirled
- White chocolate chips: Melts beautifully and creates the classic witches cauldron look when swirled with darker chocolate
- Colorful candy melts: These are your magic potion colors, grab whatever Halloween shades speak to you, they melt differently than real chocolate which adds texture
- Mini candy-coated chocolates: M&Ms or similar add pops of color and a satisfying crunch that breaks up the smooth chocolate
- Candy eyes: Absolutely essential for the spooky factor, they make the bark look delightfully creepy without being scary
- Halloween sprinkles: The finishing touch that makes everything feel festive and fun
Instructions
- Prep your workspace:
- Line a large baking sheet with parchment paper, making sure it hangs over the edges slightly, this prevents sticking and makes removal effortless later
- Melt the dark chocolate base:
- Microwave semisweet chips in 30 second bursts, stirring thoroughly between each interval, patience here prevents seizing and ensures silky smooth results
- Spread the foundation:
- Pour melted dark chocolate onto prepared pan and tilt gently to create an even layer about 1/4 inch thick, working quickly before it starts setting
- Prepare the colorful melts:
- Melt white chocolate and colored candy melts in separate bowls, using 20 second intervals since these overheat faster than regular chocolate
- Create the swirl magic:
- Drop spoonfuls of white and colored chocolates randomly over the dark base, then drag a toothpick through everything in swirling motions, don't overthink it
- Add the spooky toppings:
- While everything's still warm and glossy, scatter candy eyes, chocolate pieces, and sprinkles generously, press them gently so they adhere
- Set and break:
- Let bark firm up at room temperature for about 30 minutes or speed things up in the fridge for 15, then break into jagged pieces with your hands
 Pin it
 The first year I made this, I accidentally bought the wrong size candy eyes and ended up with these comically tiny pupils everywhere. My nephew said it looked like a swarm of microscopic bugs had invaded the chocolate. We all laughed so hard, and honestly, it tasted just as delicious. Sometimes the mistakes become the memories we talk about years later.
Make It Your Own
Swap semisweet chocolate for milk chocolate if you prefer something sweeter, or go dark chocolate for a more sophisticated flavor profile that adults will appreciate. The technique stays exactly the same regardless of your chocolate preference.
Storage Success
Keep your bark in an airtight container at cool room temperature, away from direct sunlight or heat sources. The chocolate will develop a slight bloom if stored in the refrigerator, though this does not affect the taste at all, just the appearance.
Party Perfect
This bark travels beautifully to parties and makes an excellent addition to any dessert table. Package individual pieces in clear treat bags tied with orange ribbon for classroom gifts or party favors that look professionally done.
- Break pieces just before serving rather than ahead of time for the freshest appearance
- Offer small tongs so guests can grab pieces without leaving fingerprints on the glossy chocolate
- Make double what you think you need because this disappears faster than ghosts at dawn
 Pin it
 Wishing you a Halloween filled with sweet treats, happy messes, and chocolate covered fingers. This bark is meant to be fun, not perfect, so grab some kids and let them go wild with the decorations.
Recipe FAQs
- → How long does the chocolate bark take to set?
-
The bark sets at room temperature in about 20-30 minutes, or refrigerate for 10–15 minutes until firm for faster results.
- → Can I use different types of chocolate?
-
Yes, substitute the semisweet chocolate with milk or dark chocolate based on your preference. The white chocolate can also be replaced with additional colored melts.
- → How should I store the finished bark?
-
Store in an airtight container at cool room temperature for up to one week. Avoid refrigeration unless necessary, as condensation can affect the texture.
- → Can I make this nut-free?
-
Yes, simply ensure all candies, sprinkles, and chocolate brands used are certified nut-free. Check individual labels for allergen information before preparing.
- → What other decorations can I add?
-
Pretzel pieces, chopped nuts, crushed cookies, or edible glitter work well. Just add decorations while the chocolate is still warm so they adhere properly.
