 Pin it
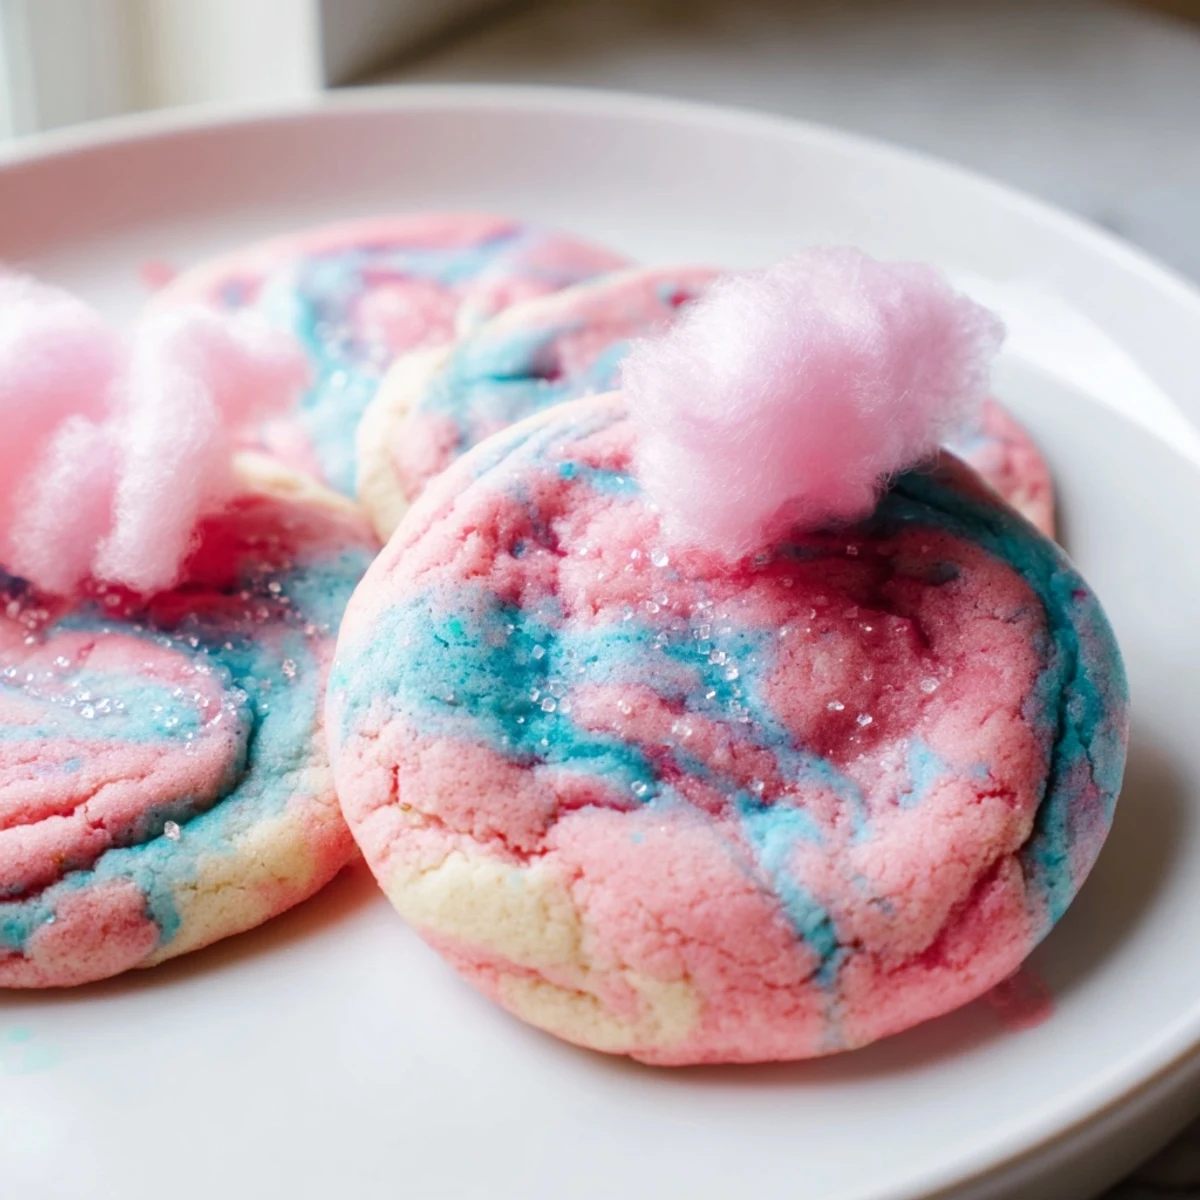
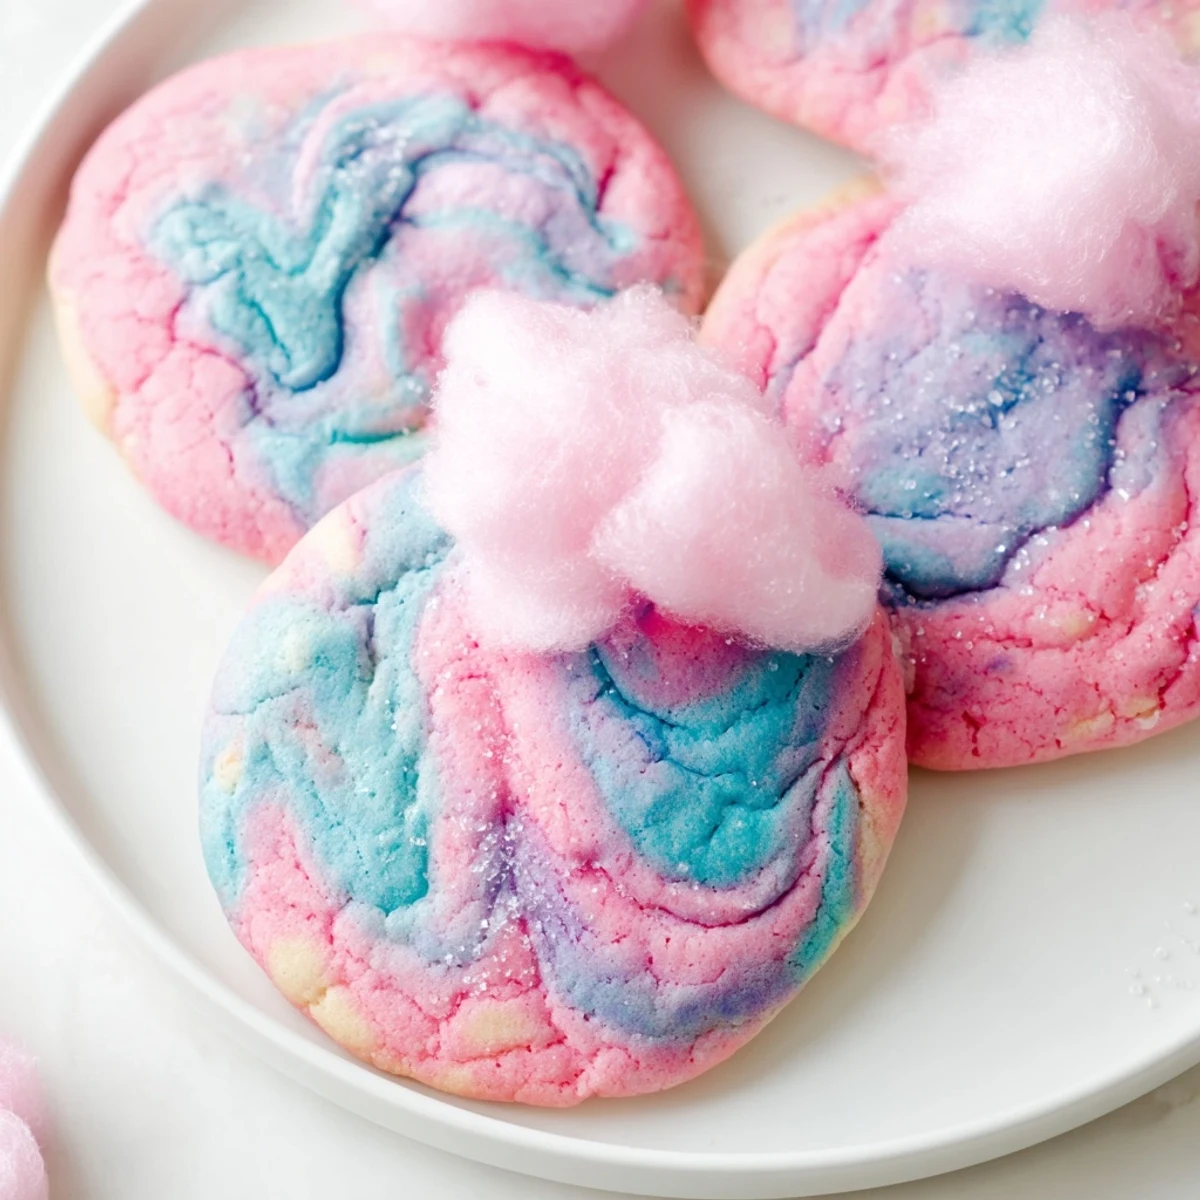
 These cotton candy cookies bring a carnival vibe straight to your kitchen. Made with a buttery vanilla dough split and tinted pink and blue, each cookie is gently swirled by hand for a gorgeous marbled look.
A splash of cotton candy flavoring infuses every bite with that nostalgic fairground taste, while an optional garnish of real cotton candy on top makes them truly irresistible.
Ready in just 30 minutes with simple pantry staples, they're an easy yet showstopping addition to birthday parties, bake sales, or any afternoon that calls for something playful and sweet.
The whole thing started because my niece asked for a carnival themed birthday party in the middle of January, and I refused to serve store bought anything. I had a bag of cotton candy flavoring sitting in my pantry from an earlier experiment gone wrong, and somewhere between the frosting disaster and the balloon arch, these cookies were born. They turned out so dreamy, with their pastel swirls and that faint sweet flavor, that half the adults at the party asked where I ordered them from. I just laughed and said the circus came to my kitchen.
I brought a batch of these to a neighborhood potluck last spring and watched a normally shy seven year old walk up to the dessert table three separate times, each time pretending it was her first visit. Her mom caught my eye from across the yard and we both just smiled. That is the power of a pastel swirled cookie. They disappear faster than you can say cotton candy.
Ingredients
- All purpose flour (2 1/2 cups, 315 g): The foundation of every good cookie, and measuring by weight here saves you from dense, sad little pucks.
- Baking powder (1 tsp): Gives these cookies their soft, pillowy lift without spreading them too thin on the pan.
- Baking soda (1/2 tsp): Works alongside the baking powder for just the right amount of rise and browning at the edges.
- Salt (1/2 tsp): Do not skip this, because salt is what keeps a sweet cookie from tasting flat and one dimensional.
- Unsalted butter, softened (3/4 cup, 170 g): Room temperature butter creams properly and traps air, which is the whole secret to a tender crumb.
- Granulated sugar (1 cup, 200 g): Adds sweetness and helps those edges crisp just slightly while the center stays soft.
- Light brown sugar, packed (1/2 cup, 100 g): The molasses in brown sugar brings warmth and chewiness that white sugar alone cannot achieve.
- Large eggs (2): Bind everything together and contribute to that cakey, soft texture we are after.
- Pure vanilla extract (2 tsp): A generous splash rounds out the cotton candy flavor so it tastes nostalgic rather than artificial.
- Cotton candy flavoring (1/2 tsp): The star of the show, and a little goes a long way, so measure carefully and do not pour with a heavy hand.
- Pink and blue gel food coloring: Gel is non negotiable here, because liquid coloring will thin your dough and muddy the swirl.
- Cotton candy for garnish (1/2 cup, 60 g, optional): A whimsical finishing touch that melts almost instantly on the tongue and looks incredible on a dessert table.
Instructions
- Preheat and prepare:
- Set your oven to 350 degrees F (175 degrees C) and line two baking sheets with parchment paper. This is also a good moment to clear your workspace, because things are about to get colorful.
- Whisk the dry ingredients:
- In a medium bowl, whisk together the flour, baking powder, baking soda, and salt until evenly combined. Set this aside so it is ready when the wet mixture calls for it.
- Cream the butter and sugars:
- In a large bowl, beat the softened butter, granulated sugar, and brown sugar with an electric mixer until the mixture looks pale, light, and fluffy. This usually takes about two to three minutes, and you will hear the texture change before you see it.
- Add the wet ingredients:
- Beat in the eggs one at a time, then add the vanilla extract and cotton candy flavoring. The dough should look smooth and smell like a midway booth on a summer evening.
- Incorporate the dry mix:
- Gradually add the flour mixture to the wet ingredients, mixing on low speed just until a soft dough comes together. Stop as soon as the last streak of flour disappears to keep the cookies tender.
- Color and divide:
- Split the dough evenly into two bowls. Add a few drops of pink gel coloring to one bowl and blue to the other, then mix each until the color is uniform throughout.
- Shape into marbled balls:
- Pinch off a small piece of dough from each color and gently press and roll them together in your palms to form a 1.5 inch ball with a swirled, marbled look. Place the balls on the prepared sheets about 2 inches apart.
- Bake until just set:
- Slide the trays into the oven and bake for 9 to 11 minutes, until the edges are barely golden and the centers still look slightly underdone. They will continue to firm up as they cool.
- Cool properly:
- Let the cookies rest on the baking sheet for 5 minutes before transferring them to a wire rack to cool completely. Patience here is the difference between a perfect cookie and a broken one.
- Garnish if desired:
- Right before serving, press a small tuft of cotton candy onto the top of each cooled cookie for a show stopping finish.
 Pin it
 There is something about handing someone a cookie that looks like it was plucked from a cloud that makes even the most serious adult crack a genuine smile. I have seen coworkers who never touch the break room sweets grab two of these without hesitation. They are a little bit of magic wrapped in flour and sugar.
Storing Your Cookies
These cookies stay beautifully soft for up to five days when stored in an airtight container at room temperature. I like to layer them between sheets of parchment paper so the colors do not transfer. If you need to make them ahead for a party, bake and freeze the plain cookies for up to three months, then thaw and add the cotton candy garnish the day of the event.
Making Them Your Own
You can swap the pink and blue for any pastel combination that fits your occasion, like lavender and mint green for a baby shower, or yellow and peach for a spring brunch. Clear vanilla extract instead of the standard brown variety will keep your colors brighter and more true. Some friends have even pressed tiny white sprinkles into the dough balls before baking for an extra sparkle that catches the light beautifully.
Quick Reference Before You Start
A few last thoughts before you tie on your apron and dive in. These little reminders will save you from learning things the hard way, like I did on more than one occasion.
- Make sure your butter is truly at room temperature, not melted and not cold, because this determines whether your dough creams properly or falls apart.
- Roll the colored doughs together gently, because overworking them will blend the colors instead of creating that beautiful marble pattern.
- Watch the oven closely during the last minute of baking, since these go from perfect to overdone in what feels like a heartbeat.
 Pin it
 Every batch of these cookies feels like a small celebration, even if the only party happening is a quiet afternoon in your own kitchen. Share them freely and watch the smiles multiply.
Recipe FAQs
- → Can I make cotton candy cookies without cotton candy flavoring?
-
Yes, you can omit the cotton candy flavoring and rely on vanilla extract alone. The cookies will still have a beautiful marbled appearance and a classic buttery sugar cookie taste.
- → How do I get the best marbled swirl effect?
-
Take small portions of both the pink and blue dough and gently roll them together in your hands. Avoid over-mixing — a light, partial blend creates the most attractive marble pattern.
- → Why should I use gel food coloring instead of liquid?
-
Gel food coloring delivers vibrant, concentrated color without adding extra moisture to the dough. Liquid coloring can make the dough too soft and affect the cookie texture.
- → How should I store these cookies?
-
Store baked cookies in an airtight container at room temperature for up to 5 days. If adding cotton candy garnish, only do so right before serving since it dissolves quickly when exposed to air and moisture.
- → Can I freeze the cookie dough?
-
Absolutely. Shape the swirled dough balls and freeze them on a baking sheet until solid, then transfer to a freezer bag. Bake from frozen, adding 1–2 extra minutes to the baking time.
- → What type of cotton candy works best for garnish?
-
Store-bought cotton candy in pink or blue works perfectly. Apply small tufts on top of each cooled cookie just before serving for the best visual impact and texture.
