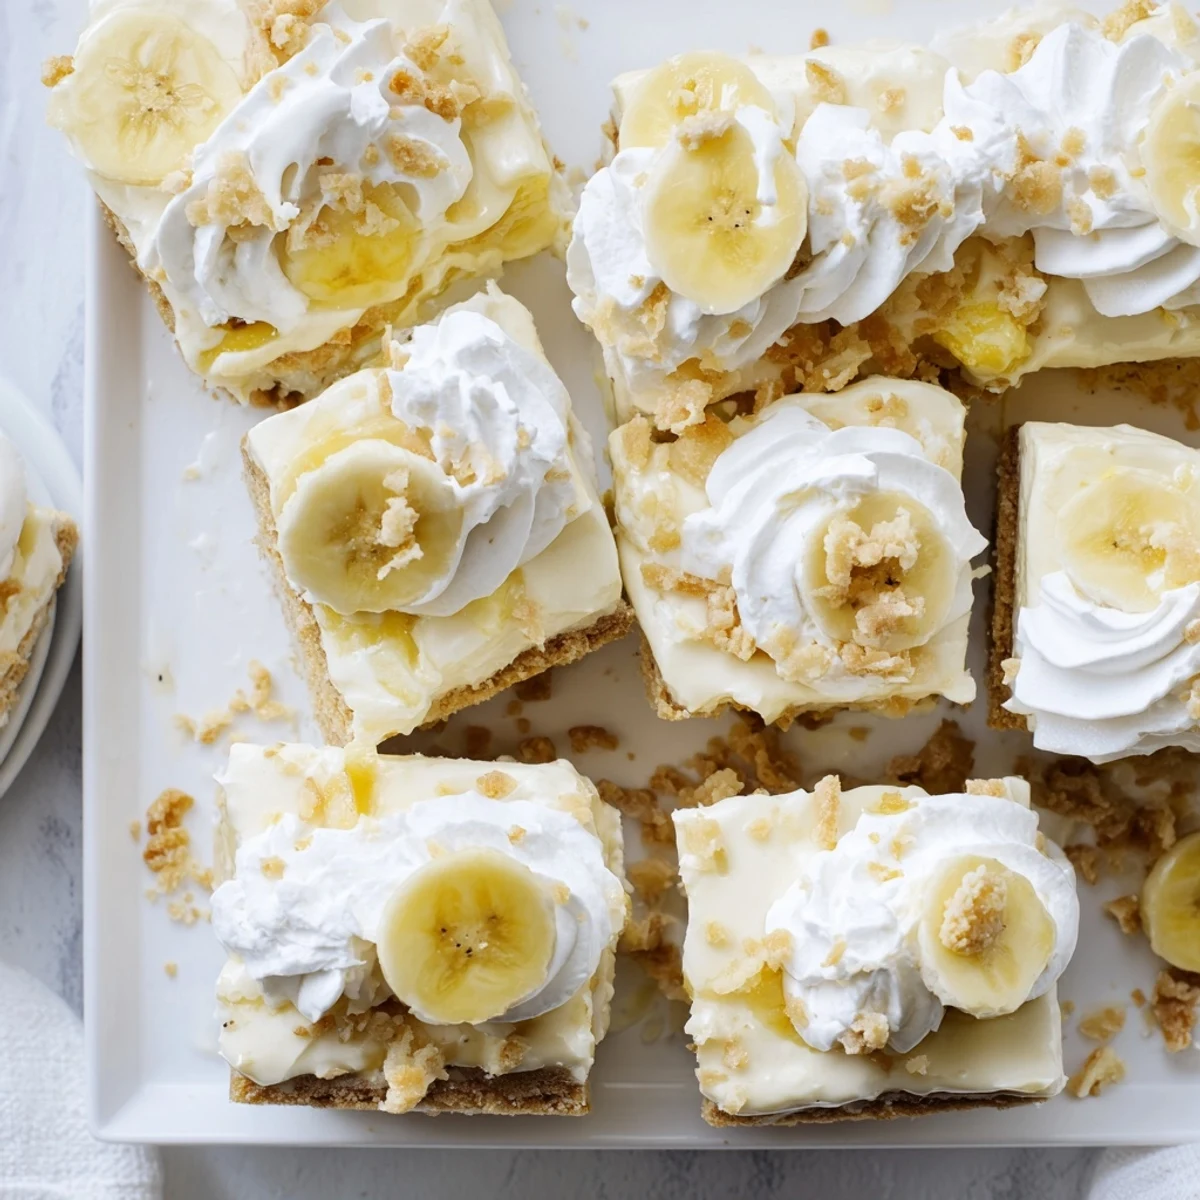
 Pin it
 These indulgent squares combine the best of two beloved desserts into one stunning creation. A buttery vanilla wafer crust provides the perfect foundation for a rich, velvety cheesecake layer infused with fresh mashed bananas. The cheesecake gets even more decadent with a traditional banana pudding layer featuring thinly sliced fresh fruit. A cloud of sweetened whipped cream crowns these bars, while additional banana slices and crushed wafers add the finishing touch. Perfect for potlucks, holidays, or whenever you need a crowd-pleasing dessert that balances nostalgia with gourmet sophistication.
The smell of vanilla wafers crumbling between my fingers transported me straight to my grandmothers kitchen, where banana pudding was practically a religion. I decided to mash that childhood memory into something a little more indulgent, and these cheesecake squares were born on a rainy Tuesday when I had too many ripe bananas and zero self control. The first pan disappeared before it even finished chilling, my family hovering around the fridge like seagulls. Now it is the only thing anyone asks me to bring to gatherings.
I brought a full pan of these to a potluck last summer and watched a grown man close his eyes after his first bite, then quietly walk back for thirds when he thought nobody was looking. That is the highest compliment a dessert can receive.
Ingredients
- Vanilla wafer cookies (2 cups crushed): The backbone of the crust and the soul of this recipe, so use the real deal, not generic wafers.
- Granulated sugar (1/4 cup for crust, 2/3 cup for filling): Separated because each layer needs its own sweetness balance.
- Unsalted butter (1/2 cup melted): Binds the crust and gives it that shortbread like snap when you bite down.
- Cream cheese (16 oz, softened): Leave it out for at least an hour, because cold cream cheese will leave you with lumpy batter and a broken spirit.
- 2 large eggs: Added one at a time so the filling stays velvety rather than curdled.
- Vanilla extract (1 teaspoon for filling, 1/2 teaspoon for topping): Divided because each layer deserves its own warm fragrant lift.
- Ripe bananas (3/4 cup mashed plus 1 sliced): The mash goes into the filling for moisture and natural sweetness, while the slices create the pudding layer.
- All-purpose flour (2 tablespoons): Just enough to stabilize the cheesecake without making it cakey.
- Sour cream (1/4 cup): This is the secret to a cheesecake that never cracks and always tastes rich.
- Instant banana pudding mix (3.4 oz): A shortcut that delivers concentrated banana flavor you simply cannot replicate from scratch in the same time.
- Cold whole milk (1 1/2 cups): Whole milk makes the pudding layer thick and lush, so do not substitute skim.
- Heavy whipping cream (1 cup): Whipped to stiff peaks, it becomes the dreamy blanket on top.
- Powdered sugar (2 tablespoons): Sweetens the whipped cream just enough without making it grainy.
Instructions
- Build the crust foundation:
- Preheat your oven to 350 degrees F and line a 9 by 9 inch pan with parchment, leaving wings hanging over the edges so you can lift the whole thing out later. Toss the crushed wafers and sugar together, pour in the melted butter, and mix until everything looks like damp sand. Press it firmly and evenly into the bottom of the pan, then bake for 10 minutes until it smells like warm cookies.
- Create the banana cheesecake filling:
- Beat the softened cream cheese and sugar in a large bowl until completely smooth with no pale streaks remaining. Drop in one egg, beat well, then the second, and follow with the vanilla, mashed bananas, flour, and sour cream. Keep mixing until the batter is uniform and smells faintly sweet and tropical.
- Bake and cool with patience:
- Pour the filling over the warm crust and spread it evenly with a spatula. Bake for 30 minutes, checking that the center is set but still has a gentle wobble when you shimmy the pan. Let it sit at room temperature for a full hour, then refrigerate for at least two hours before you even think about the next layer.
- Layer on the pudding:
- Whisk the pudding mix and cold milk together in a bowl for about two minutes until it thickens into a creamy custard. Spread it smoothly across the chilled cheesecake, then arrange thin banana slices in tidy rows over the surface. Pop it back in the fridge so the pudding can firm up properly.
- Whip and crown with cream:
- Beat the heavy cream, powdered sugar, and vanilla until stiff peaks hold their shape without drooping. Spread this cloud over the pudding layer using gentle sweeping motions so you do not disturb the bananas underneath. Garnish with extra banana slices and crushed wafers if you are feeling festive, then chill for one more hour before slicing into 16 squares.
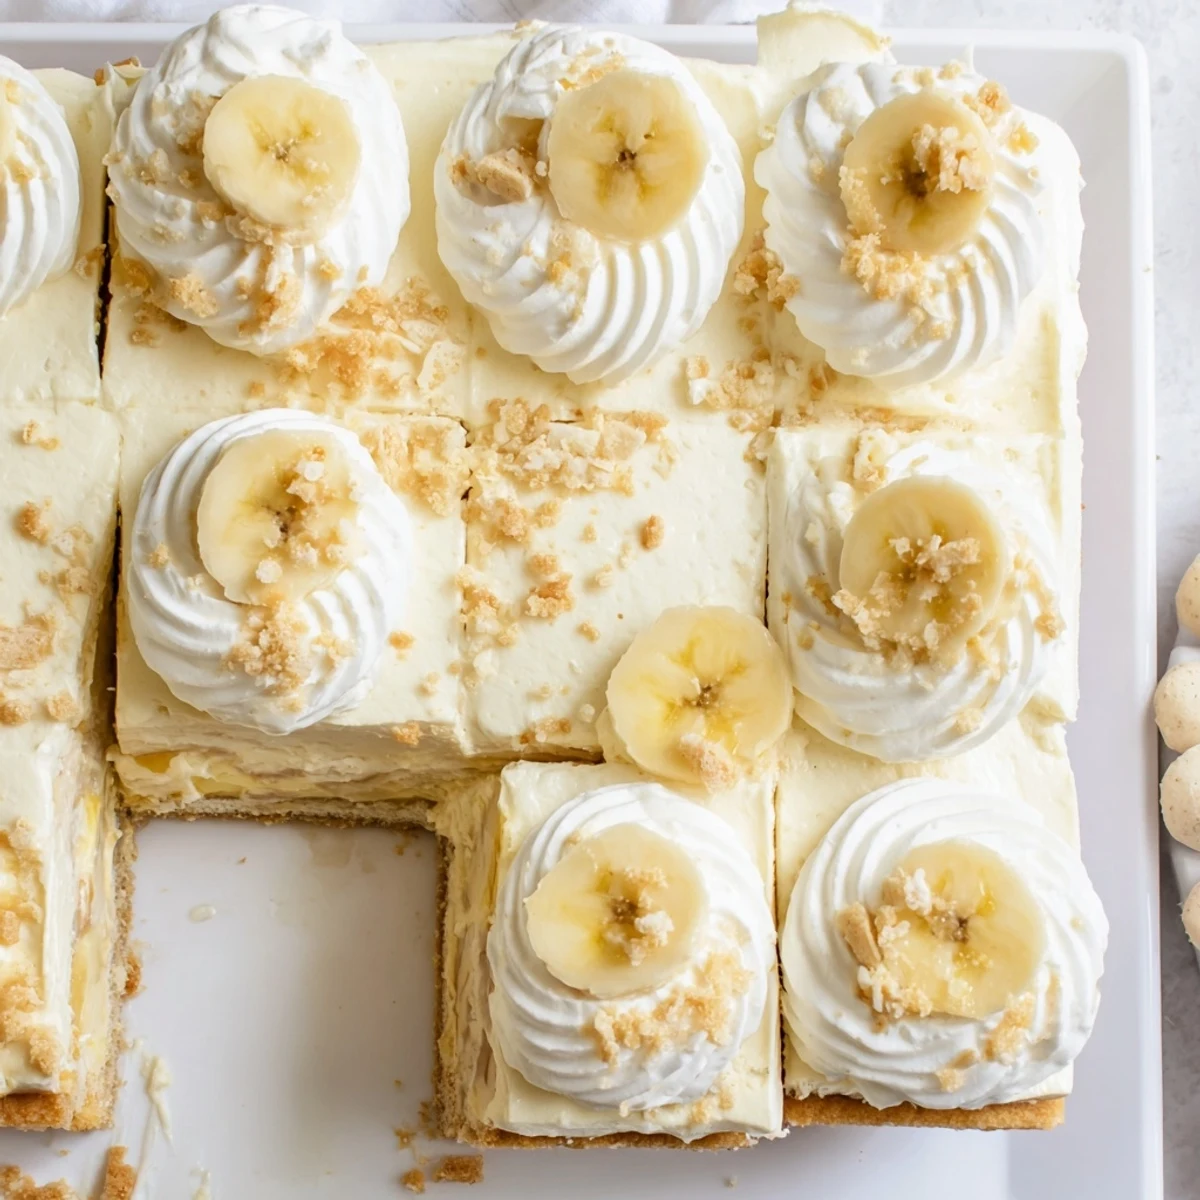 Pin it
 There is something magical about lifting the whole dessert out of the pan using the parchment overhang and cutting clean, perfect squares that reveal every golden, creamy layer.
What to Watch For
The hardest part of this recipe is waiting. I once tried to cut corners by shortening the chill time and ended up with squares that oozed into sad little puddles on the plate. The fridge is doing real work here, setting the cheesecake firmly enough to support the soft layers above it. Trust the process and your patience will be rewarded with neat, sliceable squares that photograph beautifully.
Making It Your Own
Graham crackers work beautifully in the crust if you cannot find vanilla wafers or want a slightly toastier flavor. A few drops of banana extract in the cheesecake batter will intensify the flavor, but go easy because it can quickly taste artificial. I have also swapped the banana pudding for vanilla pudding and added a layer of caramel drizzle between the cheesecake and pudding, which turned out dangerously good.
Serving and Storage Wisdom
These squares are best served cold, straight from the fridge, because the layers hold their structure and the flavors are most pronounced. If you are making them for a party, prepare everything the night before but wait to add the fresh banana garnish until right before serving.
- Cover the pan tightly with plastic wrap and store in the refrigerator for up to four days.
- Freezing is possible but the banana slices will darken and the texture of the pudding layer changes slightly.
- Always use a sharp knife wiped clean between cuts for the neatest squares.
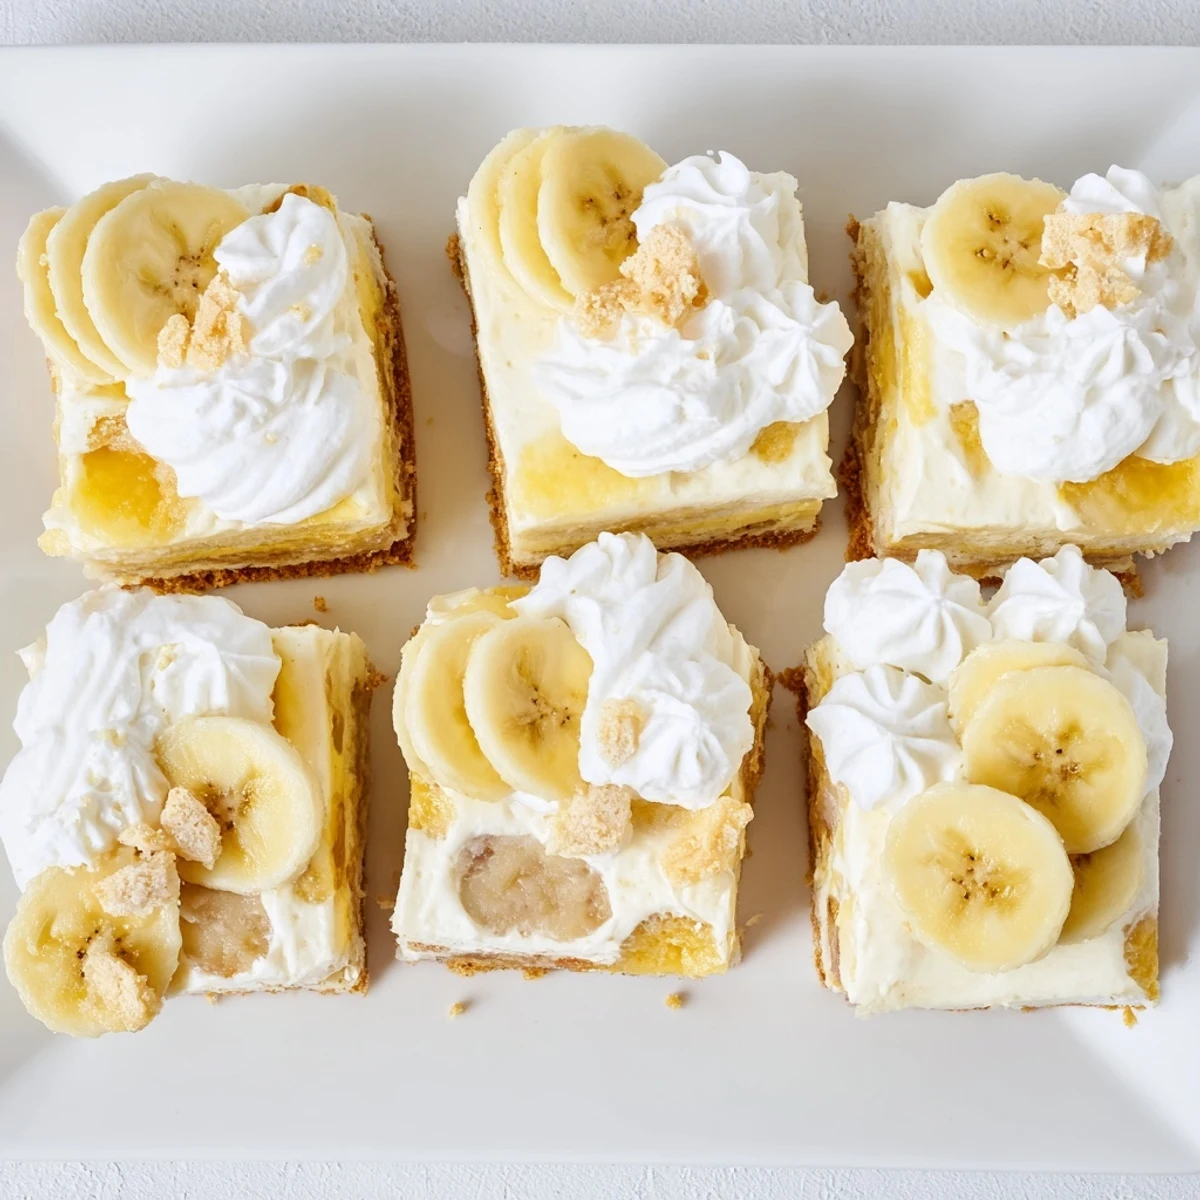 Pin it
 Every time I make these squares, someone asks for the recipe, and I always smile because the secret is simply patience and really ripe bananas. Share them generously and watch people fall in love.
Recipe FAQs
- → How long should I chill these bars before serving?
-
Refrigerate the assembled bars for at least 1 hour before cutting and serving to ensure clean slices. For optimal texture and flavor, chilling for 3-4 hours or overnight allows all layers to set properly.
- → Can I make these ahead of time?
-
Yes, these bars can be prepared up to 24 hours in advance. However, add fresh banana slices as close to serving time as possible to prevent browning. The crust, cheesecake, and pudding layers hold up beautifully when refrigerated.
- → What's the best way to prevent banana slices from turning brown?
-
Toss fresh banana slices in a mixture of lemon juice and water before arranging them on the pudding layer. Alternatively, add banana slices just before serving rather than storing them on top of the dessert.
- → Can I use frozen bananas in the cheesecake layer?
-
Thawed frozen bananas work perfectly in the cheesecake filling since they're being mashed. However, avoid using previously frozen bananas for the fresh slices on top, as their texture becomes too soft and watery.
- → How do I get clean, neat squares when cutting?
-
Run a sharp knife under hot water, dry it thoroughly, and wipe clean between each cut. Chilling the bars thoroughly before slicing also helps achieve clean edges. You can also use a plastic knife, which cuts through creamy layers without sticking.
- → Can I substitute the vanilla wafers in the crust?
-
Graham crackers, digestive biscuits, or Nilla wafers all make excellent substitutes. The flavor profile will shift slightly, but the texture and function remain the same. Crush about 2 cups of your chosen cookie to equal the original amount.
